Showing posts with label chocolate chunks. Show all posts

Saturday, 25 February 2017

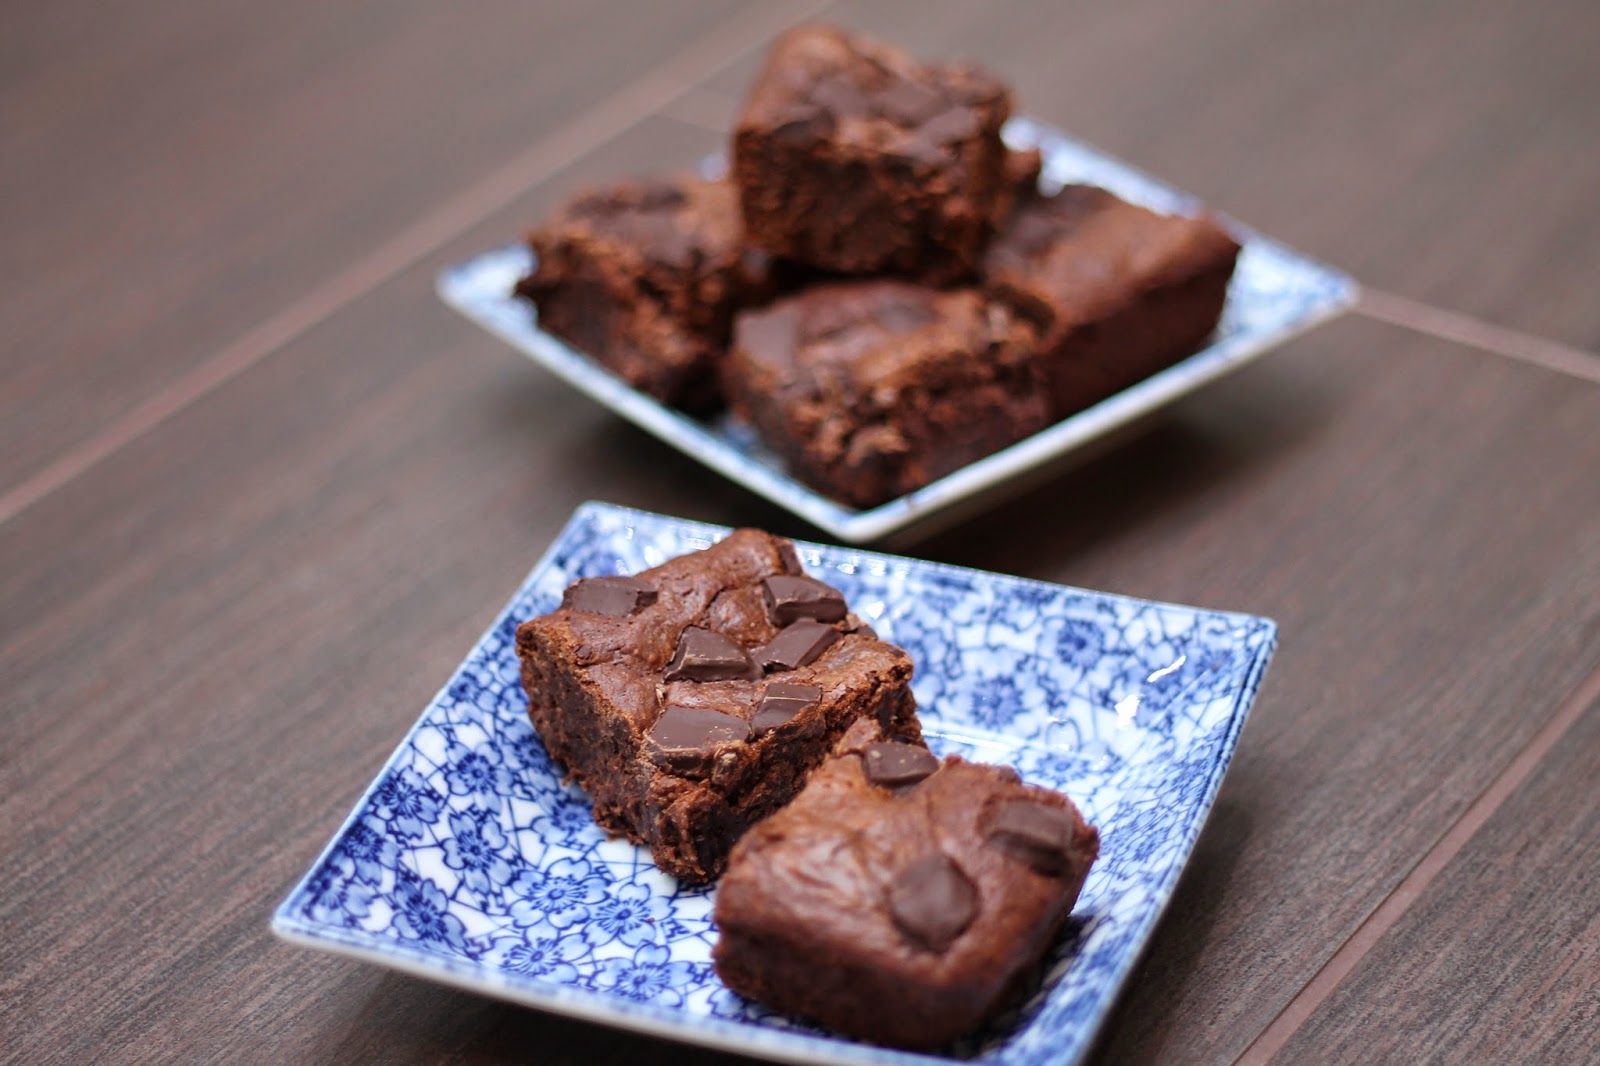
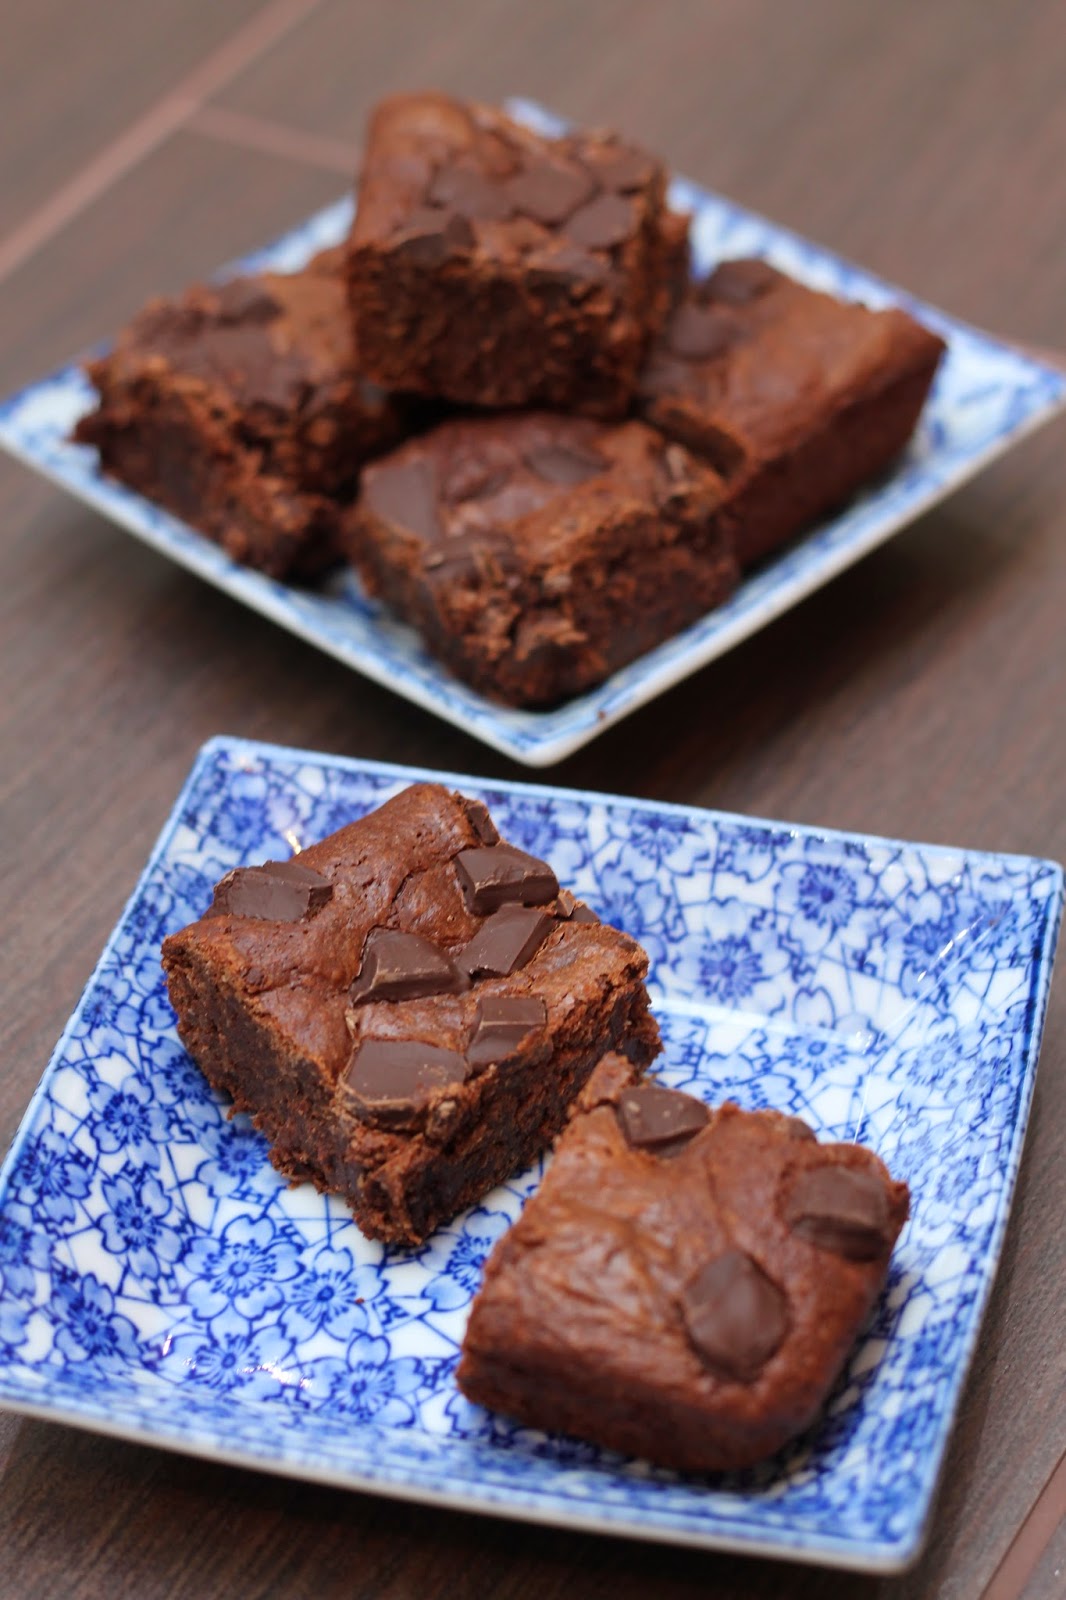
Salted Rolo blondies

Salted Rolo blondies

Whoa Nelly, am I relieved that January is over! It felt like a tortuously long 31 days of everyone around me wanting to ram their New Year’s resolution successes down my throat. I mean, good for them, but they didn't seem to believe me when I protested that I didn’t need a daily report on their seven-hour bodypump sessions in the gym, or that I couldn't see the point in celebrating the fact that they'd survived on celery sticks and cucumber seeds alone since the start of the month, (unless we were going to be celebrating with cake of course).

Salted Rolo blondies

Perhaps this makes me sound like a grumpy moo-face, and if I’m honest, part of the reason everyone’s goal-smashing exuberance bothers me is probably only because it makes me feel guilty about my own extra layer of chub acquired over Crimbo, (which is now keeping me nice and warm thank you very much!) But really, the main reason I don’t get it all is that I just don’t understand why we seek to make ourselves miserable with self-flagellating, unsustainable New Year’s resolutions.

Salted Rolo blondies

My impatience with it all hit its peak a couple of weeks back when I unwittingly found other people’s resolutions being thrust upon me. First there was the raisin incident...

Salted Rolo blondies

Whilst quietly snacking on some raisins at my desk, minding my own business, I was informed by a colleague that her personal trainer advises that one should eat raisins in a very specific way: always one at a time (let’s not be greedy now); pick up you raisin and take time to look at it and appreciate it (for what? Its wrinkliness?!); smell it (I kid you not); then when you feel you are ready to eat it, ensure you chew on it at least 50 times. I tested Mr Personal Trainer's advice and after two raisins, caved, shoving about 15 in my mouth in one go and downing them in as many seconds.

Salted Rolo blondies

The true New Year’s resolution infraction, however, was when an email from on high pingetty-ponged its way into my inbox, suggesting that cakes and treats should no longer be allowed in the office. Nothing to do with the sender of the email embarking upon a New Year’s diet at all, and everything to do with a sudden new-found concern for the health of employees’ teeth. You might imagine that I wasn't best pleased by this suggested sanction, so I went rogue, sneaking in these bonkersly addictive Salted Rolo blondies when the person banning happiness cakes wasn't looking. Funnily enough, nobody else seemed to be complaining that I did so.

Salted Rolo blondies

I can't say enough how much I love these blondies. So much that after the first batch was demolished, I straight away made a second. According to Dr D, they're one of the best things I've baked. I'm not gonna lie: he might well be right. They're like a cross between a soft, doughy cookie and a dense, moist brownie. The Rolos melt and set at the bottom, giving a half-crunchy, half-chewy caramel base that is complemented so well by the salt (as you might imagine). The second time around, I added chocolate chunks for added texture and bite, but shockingly, I am wondering if I actually preferred the chunk-less batch. I've included them in the recipe as optional, so will leave it to you to decided if you include them or not. Either way, they're extremely quick to whip up and I'm pretty sure you'll love them as much as Lord and Lady Darbyshire did.

Yields 16 large blondies
  • 200g unsalted butter
  • 150g white chocolate, broken up into small squares
  • 150g light muscovado sugar
  • 50g demerara sugar
  • 3 large eggs
  • 1 tsp vanilla extract
  • 200g plain flour (no need to sift)
  • 150-200g Rolos, fridge cold (leave in the fridge until ready to add to the blondie batter)
  • 75-100g milk or plain chocolate, chopped into small chunks (optional)
  • Maldon salt

Preheat your oven to 160C (fan).

Grease and line a 9”/23cm square baking tin. If using a silicone tin like I did, you don’t need to line with greaseproof paper but you may still want to lightly grease the base of the tin, as the Rolos make these blondies uber-sticky little blighters!

Start by melting and browning the butter in a heavy-based, light-coloured saucepan over a gentle heat (you want the pan to be light in colour so that you can keep an eye on the butter as it changes colour).

Once the butter has melted, keep it over the heat in order to turn it into browned butter: It will soon start to foam and bubble gently and you will notice that it will change colour from pale yellow to a deep, golden brown. At this stage, you need to keep a close eye on it as it can burn very quickly. When it starts to smell nutty and toasted and is really golden in colour, immediately remove from the heat.

Allow the butter to cool for about one minute, then tip the broken squares of white chocolate into the pan and let them just sit in the heat of the butter.

Meanwhile, place the sugars and eggs in a large bowl and beat together using a handheld electric whisk. Beat for 2-3 minutes on a high speed until the mixture is thick and pale. Add the vanilla and beat again briefly.

Returning to your melted butter and white chocolate, take a spatula and gently stir to fully combine. Pour the melted goop into your bowl of whisked ingredients, then tip in the flour as well. Fold with either a large metal spool or a spatula. Be patient here – don’t beat the ingredients or you’ll lose the air from the whisking process. Just keep folding gently and persistently until there are no visible clumps of flour or pools of melted butter in the batter.

Pour the blondie batter into the cake tin and set aside whilst you turn your attention to the key ingredients!

Remove the Rolos from the fridge and chop them all in half (you’ll find setting them in the fridge makes chopping them much easier). Scatter the Rolos evenly over the batter, then take a good pinch of Maldon salt and do the same.

Bake the blondie batter for 25 minutes (if adding chocolate chunks, open the oven door after 15 minutes and sprinkle the chunks over the batter, pushing them in ever so slightly if you find that the top of the blondie has started to set. Then bake for the remaining 10 minutes). RESIST any urge to bake for longer than 25 minutes in total – you want the blondies to be soft, fudgy and gooey, not dried-out, rock-hard clumps that stick in the throat!

When the blondies are in the last minute or two of their baking time, fill your sink with ice-cold water to a height that is about half that of your baking tin. Once the blondies have baked, remove the tin from the oven and gently place it in the sink of cold water, (making sure the water doesn’t get into the tin!!!) Placing the blondies in cold water will stop them cooking further, again helping them to stay gooey and soft. Allow them to cool in the water for about half an hour, then place them in the fridge to set completely. This will take at least 4-5 hours, but really I would recommend leaving them to set overnight (Dr D and I found they tasted better after the first day anyway).

After the blondies have set fully, cut into 16 squares. You may find they need to be prised gently out of the tin with a palette knife, as the melted caramel from the Rolos may have gotten them stuck to the base of the tin a little. If this doesn’t work, I recommend eating the whole lot with a spoon straight of the tin!

Wednesday, 26 October 2016

Triple chocolate and orange cookies


One of my favourite memories from when I was little - a food-related memory, obvners - is of the lady who lived next door to us making Bonfire Toffee every year for Guy Fawkes'/Fireworks Night and being kind enough to give some to mumma for me, my brother and twinny to happily rot our teeth on.

Being a ziggypiggy even at the tender young age of five, I suspect my poor siblings didn't get much of a look in with not just the toffee, but any food in the house. Still, I suppose that would explain why all the Asian auntie-jees, upon seeing twinny and I together would cast their critical eye over me before gleefully stating "Achaa [I see], so you're the chubby one".


Anyway, glossing over the kind, gentle auntie-jees with their innocuous observations and returning to toffee, sadly, as we well know, all good things must come to an end. We moved house, and for whatever reason, the next-door-neighbour refused to come with, meaning the ready supply of Bonfire toffee was no more. Hmph.


Now that I'm a fully-grown ziggypiggy, every year when Guy Fawkes' Night comes around, I hunt in vain for Bonfire Toffee and never seem to have any luck. Worse still, what saddens me is that instead of preparing for Fireworks Night, the supermarkets prefer, increasingly, to push Halloween. Since when did the Amreekanism of dressing up as ghouls and goblins and going trick or treating get so big here in the UK?

What's particularly galling is that a few years back, when my mum answered the door to some trick-or-treating teenagers, they rejected the sweets she kindly offered them and instead demanded money! Poor, naive K-Dub, robbed on her own doorstep by a bunch of ghosts! (I'm pretty sure I suggested to her at the time that we turn off all the lights and spend the evening in total silence so that any little treat-seeking opportunists would think no-one was home, but would she listen?!)


Despite my disapproval of the UK's new-found love for Halloween, I will acknowledge that not all American influences and imports are bad; it has also given us greatness. In no particular order, Chris Pine and cookies spring to mind.

Cookies. Which brings me neatly onto this recipe: one from my old girl-crush Nige. These are mahoosive mounds of ridiculously chocolate biscuit. I say biscuit because although technically they are chocolate chunk cookies, they're not chewy and are almost a little shortbread like in their crumbly texture. They require chocolate in three different formats, hence the name, and you can leave the orange zest out if you want, but that would just be silly of you. Enjoy.

Makes about 12 large cookies
  • 125g dark chocolate (70% cocoa)
  • 150g plain flour
  • 30g cocoa powder
  • 1tsp bicarbonate of soda
  • 1/4 tsp salt
  • 125g soft, unsalted butter
  • 85g soft, light brown sugar
  • 40g caster sugar
  • 1tsp vanilla extract
  • 1 large egg (cold from the fridge)
  • Zest of one large orange
  • 350g plain chocolate (40-50% cocoa), chopped
Preheat the oven to 170C (150C for fan ovens)

Break the 125g dark chocolate into large pieces in a bowl and melt either in the microwave or a bain marie, then set aside to cool a little.

Into another large bowl, sift together the flour, cocoa powder, bicarbonate of soda and salt.

Using either a freestanding mixer (with the paddle attachment) or a handheld electric whisk, beat together the butter and two sugars until light and creamy.

Add the melted chocolate to the butter and sugar mix and beat again until incorporated, then add the vanilla extract and egg and mix to combine.

Tip in the sifted ingredients and mix through, before finally adding the orange zest and chocolate chunks and stirring through once more until everything is combines.

Use a tablespoon or an ice cream scoop to measure out 12 large balls of dough and place them about 5cm apart on a couple of baking sheets. If the dough balls prove reluctant to come away from the spoon or scoop, a palette knife will help to prise them out. Don't worry about having nice, perfectly rounded balls of dough, you want them to be lumpy and bumpy. And don't flatten the tops of them!

Bake for 18 minutes, then leave to cool and set a little.

      Wednesday, 28 October 2015

      Squidgy chocolate orange loaf cake

      Squidgy chocolate orange loaf cake

      Oh crumbs, it's been months since my last blog post! When I first started A Cup of Tea Solves Everything, I promised myself that I would do at least one post a month. No doubt you’ve all been crying into your pillows with every passing day, wondering what’s happened. What can I say, I've let us all down; I can only apologise, but for what it's worth, I have genuinely been kind of busy. You see...

      I got married!!!!!!!!!!!!!!!!!!!!!!!!!!!!!!!!!!!!!!!!!!!!!!!!!!!!!!!!!!!!!!!!!!!!!!!!!!!!!!!!!!!!!!!!!!!

      Squidgy chocolate orange loaf cake

      That's right, I am very happy to report that I am now officially Mrs Rana Darbyshire, (although I also answer to Lady Darbyshire should you so prefer). I got engaged shortly after my last post and, as you might imagine, life since then got somewhat bonkers, especially as we gave ourselves all of only four months to arrange our wedding.

      Squidgy chocolate orange loaf cake

      I realise I’ve been somewhat remiss in not mentioning the ever so lovely and wonderful Dr D to you before, but whilst I am happy to share much of my life with you, dear reader, there are some aspects of it that I’ve always been rather circumspect about. I can only hope that the steady(ish) stream of cakeage up until now will prove enough for you to forgive me. Now that we’re married though, I think we can take it as a given that you’ll be hearing more about the good Doctor (PhD. Physics before anyone decides to start emailing me their ailments) in due course! For now, suffice to say, he’s everything I’ve ever hoped for and more.

      Moving swiftly on before I make anyone too nauseous, husband included(!), I can’t say I pushed myself particularly hard in terms of baking skills for my first post-wedding blog bake, but there is a fitting reason that I chose to make this particular cake.

      Squidgy chocolate orange loaf cake

      You see, our wedding cake was a beautiful rustic - or ‘naked’ - chocolate orange (what else?) mud cake, filled with ganache and decorated with fresh berries, flowers and a light dusting of icing sugar. In case you’re wondering, a naked cake is a wedding cake that isn’t covered with icing, so you get to see the sponge and filling in all its glory and don’t have to faff around with peeling off sickly-sweet fondant icing that anyone above the age of about 10 seems to loathe before you get to dig in. Simple, elegant and yummy in one’s tummy!

      So this first post, albeit not a mud cake, is a tribute to our glorious wedding cake. It’s ridiculously simple to make and seriously delicious when filled and topped with a ganache and studded with some hidden nuggets of chocolate in the midst of the loaf. Even yummier in one’s belleh if the sophistication is taken down a notch and you opt to drown a doorstep-sized wodge of it in a huge puddle of custard! Mmm, custard…!

      Squidgy chocolate orange loaf cake

      Adapted from Jo’s Blue Aga’s Very Squidgy Moist Chocolate Loaf 

      Ingredients
      Yields about 10 slices, plus a few extra muffins

      For the cake:
      • 175g softened butter or Stork (I used Stork)
      • 175g soft light brown sugar
      • 75g cocoa powder
      • 150ml just-boiled water
      • 200g self-raising flour
      • 1/2 tsp bicarbonate of soda
      • 4 large eggs
      • 250g plain chocolate (40-50% cocoa), chopped into chunks
      • Zest of an orange

      For the ganache:
      • 150ml double cream
      • 150g plain chocolate (40-50% cocoa)
      • 30g unsalted butter, at room temperature and cubed into roughly 2cm blocks
      • Zest of an orange

      Pre-heat oven to 180C (fan oven) and grease and line a loaf tin with greaseproof paper. I used a 2lb tin (21 x 8cm if you need dimensions), which was just about big enough for the sponge but the cake did come out somewhat over-sized and lop-sided as a result of me overfilling the tin, so I would recommend lining a muffin tray with a few cases in addition to preparing your loaf tin. That way, rather than pouring all the batter into the tin, you can save about a quarter of it and bake a few muffins on the side.

      Place the butter or Stork, sugar, cocoa and water into a large saucepan. Heat gently until the butter has melted, the sugar has all dissolved and your ingredients have combined, stirring as you go. Once everything is a glossy liquid, take it off the heat, stir in 100g of the chocolate chunks (which will melt in the heat of the molten gloop)  and allow to cool, for at least 10 minutes.

      Sift the flour and bicarbonate of soda into a large mixing bowl. In a separate bowl, whisk the eggs lightly, then pour the chocolate liquid from your saucepan and the eggs into the flour all in one go. Beat together with a wooden spoon or a spatula until smooth. Now add in the remaining 150g of chocolate chunks and the orange zest and mix through the batter.

      Pour about three quarters of the cake mix into the prepared tin, using the rest in your muffin cases. Bake the loaf for 10 minutes at 180C, then reduce the temperature to 140C and bake for another hour or until a knife inserted into the cake comes out clean. As the baking time for the muffins will be very different, I would bake these separate to the loaf cake (about 25 minutes on 160C fan should be enough, or again, until a skewer or knife comes away clean when inserted into the centre of the muffins).

      Leave the cake to cool completely.

      For the ganache, break the chocolate into small pieces into a bowl and add the cubes of butter. Heat the cream in a small saucepan on a gentle heat until it starts to bubble around the edges. At this point, take it off the heat and pour it straight over the broken chocolate. Leave to stand for 30 seconds, then beat with a spatula or wooden spoon until the chocolate has all melted and you have a shiny liquid ganache. Add the orange zest and stir through, then leave to cool and thicken slightly.

      Once the cake has cooled, slice it in half and spread half the ganache over the top of the base layer. Sandwich by placing the top layer back on top, then spread the remaining ganache over the top of the cake.

      Saturday, 31 January 2015

      Coconut chocolate-chunk brownies

      Coconut chocolate-chunk brownies

      I have a confession to make. A few weeks back, during a holiday to Spain, I was feeling rather pleased with myself for how well I was getting by gibbering away in Spanish with the locals. Needless to say, my smugness came back to bite me on my not insubstantial bottom when I asked the receptionist if 'las sartenes' in my hotel room could be changed. After a few moments of scrutinising me closely to see if I was quite all right in the head, the receptionist kindly suggested perhaps madam meant ‘las sabanas’, since he assumed - correctly so - that it was probably the bedsheets that I wanted changing rather than the, umm, frying pans...

      Whilst I’m in an "honesty is the best policy" frame of mind, I have another confession to make: last week I baked a chocolate cake with a view to posting it on this blog, but rather than going on the blog, the whole thing went in the dustbin. It was dry, sickly sweet, and the frosting so runny that the top layer kept slipping off the bottom layer, no matter how many times I tried to firmly sandwich them together. The end product looked not unlike something scooped up by dog owners (the polite ones anyway), when they’re out taking Coochie-Woochie Waa-Waa for walkies.


      Coconut chocolate-chunk brownies

      There’s a reason I’m confessing these things to you, dear reader. It strikes me that in the world we live in today - a semi-virtual world conducted through Twitter, the Book of Face, Instagram and the like - it’s often easy for people to portray their lives as flawless, magnificent and wonderful at all times, making the person on the other end of the internet feel as though their own life is a little, well, lacking, in comparison. We all know someone with 1,654,000 close friends on Facebook, or that person generous enough to regale us with weekly photos of themselves tanned and toned in their swimwear.

      So I’m telling you about my blush-inducing error in Espana and my baking disaster to reassure you that, whilst I might give the impression that I am a fluent Spanish-speaking domestic goddess, I’m really just as capable as the next person of making a buffoon of myself and that, even as a cake blogger, I don’t always get it right.


      Coconut chocolate-chunk brownies

      After the disastrous dog-poopy cake, I wanted to bake something simple and easy that I knew wouldn’t go wrong, which meant brownies. This recipe is from a chocolatier whom I love, Paul A. Young. I’ve bought brownies from his stores before and they’re amazing. Dense, rich and intense. So intense that sometimes the best approach is to nibble away at the brownie over a few days. These coconut brownies are the same. I adapted them slightly, adding more coconut and sprinkling some chocolate chunks on top (in place of cherries), because as you and I both know, I can’t help myself. Try them. I promise you, you won’t throw them in the bin.

      Coconut chocolate-chunk brownies

      Adapted from Paul A. Young's Bing cherry and coconut brownie in 'Adventures with Chocolate'

      Ingredients
      Makes about 16 brownies
      • 100g unsalted butter
      • 250g golden caster sugar
      • 75g golden syrup
      • 275g dark chocolate (70% cocoa), broken into pieces
      • 4 medium eggs, lightly whisked
      • 70g plain flour
      • 100g unsweetened desiccated coconut
      • 85g plain chocolate (50% cocoa), chopped into chunks
      Preheat the oven to 160C and grease and line the base and sides of a deep, square baking tin (mine was about 18cm x 18cm x 4cm).

      In a large saucepan, melt the butter, sugar and syrup on a low heat, stirring occasionally to mix (might I implore you to take a moment here to inhale the smell of the glorious sticky syrupyness and wonder at its deliciousness?)

      Once the mixture is all melted and combined (note that it will remain grainy from the sugar), take it off the heat and add the dark chocolate pieces, mixing to melt the chocolate through.

      Add the whisked eggs and beat thoroughly into the chocolate mixture, before adding the flour and coconut and giving one final thorough mix.

      Pour the brownie batter into your baking tin and then sprinkle the plain chocolate chunks evenly on top.

      Bake for 20 minutes before removing from the oven.

      Allow to cool, then refrigerate in the tin for at least 4-5 hours before cutting into squares and chowing down!

      Wednesday, 24 December 2014

      Christmas shortbread

      Christmas shortbread

      A couple of years ago I wrote a post, here on A Cup of Tea Solves Everything, for my Christmas Rocky Road. In that post I reflected upon the year that was about to end and how it had been an 
      annus horribilis: one that had unfortunately been full of far more downs than ups and all in all, was rather tumultuous for all the wrong reasons.
      Christmas shortbread

      Two years on from that post and some of the things of which I spoke haven’t changed: for the most part, regrettably, I am still a cotton-headed ninnymuggins; whilst my nephew who was born that year is still, happily, scrumdiddlyumptious. In many other ways though, life has changed, and I’m pleased to say, vastly for the better.
      If 2012 was an annus horribilis, one might say that 2014 has been, at the very least an annus bonkersis, but really more of an annus marvellousis: I’ve been fortunate enough to travel to parts of the world I never imagined going; I had an unforgettable time volunteering at an orphanage abroad; I have worked hard on my Spanish and am proud to say, have been rewarded for it; I’ve been surrounded by people I love; oh and my shoe collection has grown exponentially. Not sure I could ask for much more!
      Christmas shortbread

      Not being Mystic Meg - a sad truth I have slowly come to accept - I don’t know what 2015 has in store, but I do have high hopes for it. Certainly if it’s anything like 2014, I shall continue to be a happy cotton-headed ninnymuggins.
      Christmas shortbread

      However, let me not be too hasty and wish away what’s left of 2014! After all, the most wonderful time of the year is upon us, and as always, I can barely contain myself (have I mentioned I love Christmas?!)! The fairy lights have been put up, Elf has been watched (sadly not as many times as I would like) and I’ve been listening to Christmas songs for far longer than is socially acceptable. I also baked these Christmas shortbreads, which a fellow baker, upon trying, stated were the ‘best shortbread ever’. If you need further convincing, I snuck some chocolate in them too. Well, come now, we all know that everything tastes better with chocolate…
      Christmas shortbread

      Merry Christmas! X
      Adapted from Jo’s Blue Aga: A very Christmassy shortbread
      • 250g plain flour
      • 125g corn flour
      • 250g unsalted butter, softened
      • 125g caster sugar
      • 200g mincemeat
      • 100g plain chocolate (40-50% cocoa), chopped into chunks
      • 25g flaked almonds
      • 25g dried cranberries
      • 1-2 tbsps golden granulated sugar for sprinkling

      You will also need a baking sheet. I used a 28cm x 17cm sheet, greased and lined with baking parchment.
      Preheat the oven to 160ºC.
      Place the flour, corn flour, butter, and caster sugar in the bowl of a food processor and pulse until the mixture comes together to form a soft dough.
      Press about half of the dough firmly and evenly into the baking sheet to a thickness of about 5mm.
      Spread the mincemeat over the dough and then sprinkle the chocolate chunks evenly over the top.
      On a piece of baking parchment that is a little bit larger than your baking sheet, shape the remaining dough to fit over the mincemeat, then gently slide the shaped dough on top of the mincemeat-covered layer of dough.
      Press the edges of the two layers of dough together gently with your fingertips, and then sprinkle over the flaked almonds and dried cranberries, pressing them lightly into the top of the shortbread so that they stick.
      Bake on the middle shelf of the preheated oven for 35-40 minutes or until the shortbread is a pale golden colour.
      Once out of the oven, sprinkle evenly with the golden caster sugar and allow to cool slightly before cutting into shape. Leave to cool completely before removing from the tin and serving.

      Wednesday, 25 June 2014

      Dulce de leche carrot cake (with chocolate chunks)

      Dulce de leche carrot cake (with chocolate chunks)

      According to someone I know, I have an inbuilt homing device when it comes to seeking out new bakeries, patisseries, coffee shops and cafés. I may be wrong here but I suspect said person speaks of this homing device not as the superpower it evidently is – something to be admired, respected and downright in awe of - but rather, through gritted teeth because every new place I spot that has cakes displayed in the window is somewhere I will then prattle on about until we get to check it out.


      One such place I recently found out about was a South American bakery. It's not somewhere I'd seen in person but a place I'd heard of online and subsequently gotten rather excited about visiting, especially given my penchant for all things Latin American and Spanish (the language, the food, the landscapes, Enrique Iglesias…) Much to my dismay I've since discovered that the bakery in question no longer seems to have a fixed abode. There may or may not be a mobile stall to be found in different locations across London on randomly allocated weekends but my Go-Go Gadget coat and I are still trying to get to the bottom of this.


      Dulce de leche carrot cake (with chocolate chunks)

      In the meantime, during my online discovery, I noted carrot cake was on the menu. Nothing out of the ordinary there but this one had a South American twist: dulce de leche. I've mentioned dulce de leche before. It's become quite popular here in the UK, but nowhere near as omnipresent as in the continent it originates from; visit somewhere like Brazil for example and you'd have a hard time avoiding the stuff. Not that you'd want to avoid it. Unless you're just weird, in which case, that's okay, I’m cool with that.


      Dulce de leche carrot cake (with chocolate chunks)

      So yes, dulce de leche carrot cake. As I am still seeking out the mysterious bakery, I thought I'd make my own version of the cake in the meantime; I’m very glad I did. I found that the dulce de leche really complemented the spiciness, moistness and zestiness of the carrot cake by adding a deep caramel tone. I experimented further by adding roasted, salted cashews to the batter to offset some of the sweetness from the dulce de leche.

      With hindsight my one regret is not adding chocolate chunks to the mix (I’m covering my ears to block out your cries of protest here. What’s that? No, I can’t hear you I’m afraid). There is no doubt in my mind that a few nuggets of chocolateyness scattered through the sponge would be an invaluable addition, so to ensure you don’t make the same mistake, I’ve incorporated them into the recipe below for you. Leave them out if you like but just know that if you do, you and I can no longer be friends. Neither of us wants that now, do we?


      Dulce de leche carrot cake (with chocolate chunks)

      Adapted from BakeSpace.com's Dulce de leche carrot cake

      For the cake:
      • 320g dulce de leche
      • 355ml sunflower oil
      • 85g golden granulated sugar
      • 4 large eggs
      • 2 tsp vanilla extract
      • Juice of half a lemon
      • 350g plain flour
      • 1½  tsp cinnamon
      • ½ tsp ground ginger
      • ½ tsp ground nutmeg
      • 2½ tsp baking powder
      • ½ tsp baking soda
      • 200g grated carrots (about two medium carrots)
      • 55g sweetened desiccated coconut
      • 85g roasted and salted cashews, roughly chopped
      • Zest of one orange
      • 150g plain chocolate chunks, 40% cocoa
      For the cream cheese frosting:
      • 300g full-fat cream cheese
      • 75g unsalted butter, softened
      • 250g icing sugar
      • Zest of one lemon
      • Zest of one orange
      • Handful of nuts, roughly chopped, to decorate (I used pistachios)
      To sandwich the cake:
      • 80-100g dulce de leche
      Preheat oven to 180C (160C for a fan oven) and grease and line two 8” sandwich tins.

      In a large bowl, whisk together the dulce de leche, sunflower oil, sugar and eggs (I used electric hand-held whisk but a standard balloon whisk with some elbow grease should be just fine).

      Add the vanilla extract and lemon juice and whisk again.

      In a separate bowl, sift together the flour, spices, baking powder and baking soda.

      Fold the sifted ingredients into the large bowl of wet ingredients, using a spatula or large metal spoon. Don’t worry if the mixture looks lumpy and as though it’s not combined, it will come together once you’ve added the remaining ingredients.

      Finally, add the carrots, coconut, cashews, orange zest and chocolate if using, and stir to combine.

      Pour or spoon the mixture evenly between the two tins.  Place the tins on the middle shelf of your oven and bake for 30-35 minutes.  The cakes will be done when a metal skewer or knife inserted into them comes out clean.

      Once baked, allow the cakes to cool in the tins for 15-20 minutes before removing from the tins and leaving to cool entirely on a cooling rack.

      To make the frosting, beat the cream cheese and butter together (again, I used an electric hand-held whisk, but a wooden spoon would work fine as long as the butter is soft enough).  Once combined, add the icing sugar and beat again.  Finally, stir in the lemon and orange zest.  Refrigerate until you are ready to assemble the cake.

      To assemble the cake, once the sponges are cool, slice each one in half horizontally using a large, serrated knife.

      Place the top half of one of the sponge layers upside-down onto the plate you will be serving the cake on.  Spread half of the dulce de leche onto this layer, then cover with the top half of the sponge, again placing the sponge upside-down. On this half, spread a generous amount of the cream cheese frosting before placing the bottom half of the second sponge on top (right way up this time). Spread the remaining dulce de leche on this layer before covering with the final sponge layer and spreading this with the remaining frosting.

      Sprinkle the top of the cake with the chopped nuts.

      Refrigerate until ready to serve.

      Sunday, 20 October 2013

      Speculoos, banana and chocolate chunk cookies

      Speculoos, banana and chocolate chunk cookies

      Well before the Great British Bake Off, there was a daytime cookery programme on television called ‘Ready, Steady, Cook’. The premise of the show was to pair celebrity chefs up with contestants who would present them with a bag of mystery ingredients; each chef then had just 20 minutes to make something from scratch for/with the help of their contestant, using said ingredients.

      Speculoos, banana and chocolate chunk cookies

      Whilst watching the programme, I would always ponder what I'd take along in my bag if I were ever on the show. Invariably I’d settle upon ingredients that I knew would give the chefs no other option than to make something sweet and, ideally, chocolaty.  I mean come on, 20 minutes for a top chef to make something especially for you - surely it would be bonkerdom to want them to make anything other than a dessert!

      Speculoos, banana and chocolate chunk cookies

      Anyhoo, a few months ago a very lovely friend of mine came over for dinner and I was reminded of ‘Ready, Steady, Cook’ because, rather than conforming to the norm and bringing flowers or a box of chocolates (not that I would ever object to receiving either of those things should you be so inclined), my friend brought me ingredients. As I pulled each thing out of the bag, I contemplated what I could make with it, as though I myself were one of the famous chefs (humour me here) on the show once so beloved by me. The pièce de resistance of all the ingredients was a jar of Speculoos: a delicious Belgian biscuit-spread made from crushed, spiced biscuits, with a sort of gingerbread-like or caramelised taste to it.

      Speculoos, banana and chocolate chunk cookies

      After a couple of months of research and deliberation (this is not a matter to be taken lightly people!) I opted to use the spread to bake Speculoos, banana and chocolate chunk cookies. I liked these cookies.  I liked them a lot.  They’re warm and earthy and comforting with a crisp outside and a chewy interior – as cookie-like as a cookie should be.

      Speculoos, banana and chocolate chunk cookies


      Note: When I first baked these, I found the banana overpowered the Speculoos a little so in the recipe below, I’ve toned down the banana and increased the biscuit spread:unsalted butter ratio so that you really get a hit of the spices.

      Makes about 26 medium-sized cookies
      • 85g unsalted butter, melted
      • 8 tbsp Speculoos
      • 165g light brown sugar
      • 105g granulated sugar
      • 1 egg yolk (from a large egg)
      • 2 tsp vanilla extract
      • 1 ripe banana (medium size), roughly mashed
      • 300g plain flour
      • ½ tsp baking soda
      • 200g plain chocolate (40% cocoa), chopped into chunks

      Beat the melted butter, Speculoos and two sugars together in a large bowl until combined (I used a handheld electric whisk but a wooden spoon will work just as well).

      Next, beat in the egg yolk and vanilla extract before adding in the mashed banana and beating again.

      Sift the flour and baking soda together then add in thirds to the wet ingredients, mixing until it is all incorporated and you have a cookie dough consistency.

      Finally, add in chocolate chips.

      At this point, ideally refrigerate the dough for a minimum of two hours, but preferably overnight, so that you get a chewier cookie at the end of the baking process.

      When ready to bake, preheat the oven to 160C (fan) and line two flat baking sheets with greaseproof paper.

      Shape the dough into roughly the size of a golf ball and place on the baking sheets about 2 inches apart from each other.  If you’re using two baking sheets, all the cookies will not fit on at the same time, so you will need to shape and bake them in two batches.

      Bake for 12 minutes, until the edges are golden and the middles are puffy.

      Thursday, 27 December 2012

      Nutella and hazelnut-stuffed browned butter chocolate chunk cookies


      Nutella and hazelnut-stuffed browned butter chocolate chunk cookies

      So that’s it, Christmas is over and most of us are probably eating leftover turkey sandwiches (I’ll have mine with a wedge of brie and a dollop of cranberry sauce please) whilst contemplating the plans for New Year’s Eve.  At the risk of sounding like a grumpy old woman, I must say, I’ve never been a huge fan of New Year’s.  For me, it comes second only to Valentine’s Day (don’t get me started!) as an over-hyped ‘holiday’ designed to make most people feel pretty pants about themselves.

      I cannot be alone in thinking thus.  The pressure to go out on New Year’s Eve and have a wonderful time is surely enough to give anyone a nervie b and - for me anyway - 9.9 times out of 10 it’s an anti-climax.  So much so in fact that usually I am more than happy to stay indoors, comfy-cosy in my PJs, watching all the commotion on television and trying – usually unsuccessfully - to stay awake long enough for the countdown.  Perhaps it’s a sign of my age…

      Nutella and hazelnut-stuffed browned butter chocolate chunk cookies

      Having said all that, this year, I’m doing a volte-face.  I’ve been invited to a house party you see, which, not only do I plan to go to, but I actually plan to get dressed up for (yes my friends, rejoice, the pyjamas will be shed!) and whatever happens darn it, I will have, not just a good time, but like, oh-my-God, just like, the most super-amazing time, like everrrr!!!

      Of course, after the big night out will come the inevitable New Year’s resolutions to detox/lose weight/start exercising/[fill in with your resolution of choice].  But before all that, should you want to make the most of the remaining few days to indulge (until we all give up on our resolutions that is), I can’t recommend these Nutella-stuffed chocolate chunk cookies highly enough.  I came across them on the fantastic blog Ambitious Kitchen.  Admittedly, they take a bit more time and effort to make than your average cookie, both because of the beurre noisette* and the Nutella filling, but I can guarantee you, Cookie Monster would definitely approve!

      
      Nutella and hazelnut-stuffed browned butter chocolate chunk cookies
      

      These cookies are chewy, soft and buttery with a secret stash of Nutella hiding away in the centre, ready to shout 'BOO!' out at you when you bite into it!  Ideally, they're best eaten on the day of baking, whilst the Nutella centre is still soft and gooey.  Yummo!  I tweaked my cookies ever so slightly by adding a whole hazelnut into the centre of the Nutella, à la Ferrero Rochers, and by omitting the sea salt (mainly because I forgot to sprinkle it on while the cookies were still hot.  Doh!)

      *Beurre noisette is brown butter.  If you’re nervous about making it, there are online guides on how to do so.  This how-to, on Ambitious Kitchen’s website saw me through the process (after I’d burnt my first lot!): http://www.ambitiouskitchen.com/2012/12/how-to-brown-butter-a-love-story/


      Makes around 20 cookies
      • 20-25 whole hazelnuts
      • 335g plain flour
      • 1¼ tsp bicarbonate soda
      • ¼ tsp salt
      • 220g unsalted butter
      • 210g dark brown sugar
      • 45g granulated sugar
      • 1 large egg plus 1 egg yolk
      • 1 tbsp plain greek yogurt
      • 1½ tsp vanilla extract or 1 tsp vanilla paste
      • 250g chocolate chunks (I used 40% cocoa but you can use darker if you prefer.  I think milk chocolate would make the overall cookie too sweet – it’s very sweet as it is!)
      • 1 jar of Nutella, chilled in the fridge (200g should be enough, but it might be safer to buy a 400g jar. After all, anything you don’t use up for the cookies, you can just polish off with a spoon!)
      To start, toast the hazelnuts by placing them on a baking sheet and popping them in the oven at 180C (160C fan) for 7-10 minutes.  Check them periodically to make sure they aren’t burning.  Once toasted, leave to cool, then rub gently in a clean tea towel to remove as much of the papery skins as possible (the skins can be bitter which is why they're best removed).

      Sift the flour, bicarb and salt together into a bowl and set aside.

      To make the brown butter, or beurre noisette, melt the butter in a saucepan over a medium heat. The butter will begin to foam. Make sure you whisk consistently during this process.  After a couple of minutes, the butter will begin to brown on the bottom of the saucepan.  Continue to whisk and remove from heat as soon as the butter begins to brown and give off a nutty aroma.  Immediately transfer the butter to a cold bowl (either chilled in the fridge or over some ice) to prevent burning. Set aside to cool for a few minutes.

      Once your butter has cooled, with an electric mixer and a K-beater attachment, mix the butter and sugars until thoroughly blended (a good few minutes).  Then beat in the egg, yolk, yogurt and vanilla until combined.

      Next, add the sifted dry ingredients in thirds, beating on a low speed until fully incorporated.

      Finally, fold in the chocolate chips.

      Chill your dough for a minimum of two hours in the fridge, or even overnight if you can wait that long (a chilled dough results in a softer, chewier end cookie, so you really need to dig deep for some willpower and make sure you go through with this step, rather than skipping it and rushing to make the cookies so that you can eat them sooner!)

      Once the dough is chilled, preheat the oven to 180C (160C for a fan oven) and line three or four baking sheets with greaseproof paper (if you don’t have this many baking sheets, don’t worry, you can bake the cookies in batches).

      Measure out about 1½ tablespoons of dough at a time and roll into a ball. Flatten the dough ball very thinly into the palm of your hand or onto your work surface.  Place a generous teaspoon of chilled Nutella in the middle and gently push one hazelnut into the Nutella.

      Raw Nutella and hazelnut-stuffed browned butter chocolate chunk cookie

      Now fold the dough around the Nutella, encasing the Nutella and hazelnut inside the dough.  Gently roll the dough back into a ball, making sure that the Nutella is not seeping out.

      Place dough balls onto your baking sheets, about two inches apart to allow for spread as they bake.

      Raw balls of Nutella and hazelnut-stuffed browned butter chocolate chunk cookies

      Bake the cookies for 10 minutes until the edges of the cookies begin to turn golden brown. They may look a bit underdone in the middle, but will continue to cook once out of the oven.

      Cool the cookies on the sheets for five minutes before transferring to a wire rack to cool completely.