Friday 24 November 2017

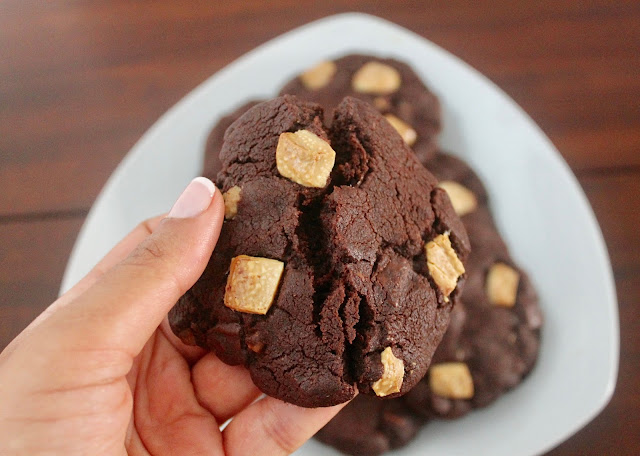
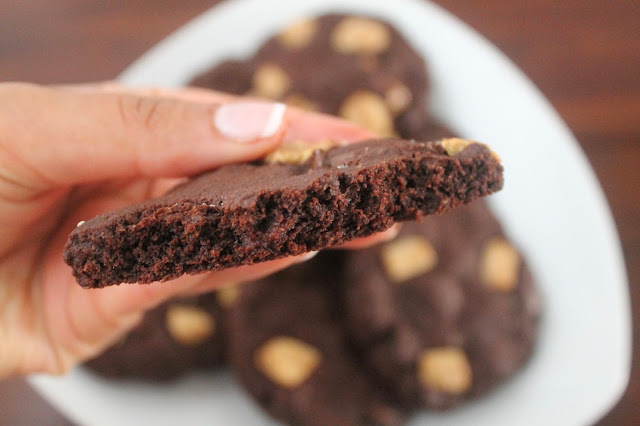
Brownie cookies sandwiched with orange tahini cream (gluten free)


I have some news. I've left Dr D. Left him and moved back in with my mum.

It's been emotional and somewhat of a roller-coaster, since I feel both terrible and extremely happy about it all at the same time: terrible for leaving my husband; full of joy at being back with my mummatha!


Before anyone gets carried away, let me just clarify that the move is temporary and is no reflection whatsoever of my love for the wonderful Dr D. It's actually due to the fact that we've been having major work done on our house, which last week sent me over the edge: the cold; the mess; the filth and dust; three random workmen helping themselves to whatever they could find in our larder (wtf?!) and using our bathroom umpteen times a day... It all pushed my patience, and my OCD, to the limit.

So I had a mini tantrum, packed my bags and left poor Dr D to deal with it all whilst I sought comfort in the cosiness of my childhood home.


Being back at mum's is the best. I get cups of tea, dinner, mumma-bear hugs all on demand. In fact no, I don't even have to ask for them, they are lavished upon me! But as I already said, I do simultaneously feel terrible for leaving my poor hubby to deal with the chaos that is our house. The only conclusion we might draw from all this is that I'm evidently a rubbish wife. The going got tough, so I got going.


I figured, maybe if I baked these cookies for Dr D every day for the next year or so, perhaps that might make amends for my poor show? I've baked them twice so far and he definitely loved them, so I'm confident my strategic plan of action will work.


Seriously, these cookies are like crack cookies. They're squidgy and chewy and brownie-like in texture, and intensely chocolaty in taste, with a hint of tahini and orange in the cream filling, which perfectly complements the fudgy brownie-ness and nuggets of chocolate chunks. Be warned, they're ridiculously addictive and also stupidly easy to make, so you are liable to find yourself in a never-ending cycle of baking and scoffing, baking and scoffing. Personally, I don't think that's such a bad place to be. Beats being in a cold, dirty house, that's for sure.


Adapted from Sarit Packer and Itamar Srulovich (aka Honey & Co - one of my all-time favourite restaurants!) Chocolate sandwich cookies filled with tahini cream 

Makes 6-7 sandwich cookies (or 12-14 single cookies)

For the cookies:
  • 40g unsalted butter
  • 250g dark chocolate (70% cocoa)
  • 2 large eggs
  • 150g light brown soft sugar
  • 20g cocoa powder
  • 75g plain chocolate (50% cocoa), chopped into chunks
For the filling:
  • 50g tahini (for the uninitiated, it comes as a paste in a jar and is available in most supermarkets)
  • 60g full fat cream cheese
  • 25g icing sugar
  • Zest of one orange
  • 50g double cream
Preheat the oven to 190C (fan) and line two baking sheets with baking parchment.

Melt the butter and chocolate together in the microwave or over a bain marie, then set aside to cool slightly.

Whilst the melted butter and chocolate are cooling, using a handheld electric whisk, whisk the eggs and sugar until thick, pale and mousse-like.

Now take a large metal spoon and use it to fold the melted butter-chocolate mixture into the eggs and sugar.

Once combined, add the cocoa powder and chocolate chunks and fold again until you have a light, chocolaty batter.

Use your large metal spoon to drop spoonfuls of the batter onto your lined baking sheets, leaving space between each cookie as they will spread during baking. Don't be alarmed if the mixture is quite runny - remember there's no flour to bring it all together, but when baked, it will solidify into a lovely chewy brownie-like cookie. You should get 12-14 mounds of cookie dough in total on your baking sheets.

Bake the cookies for 9 minutes, then remove them from the oven and allow them to cool completely on the tray before filling. You may find that, once cool, they've stuck a little to the baking parchment. If so, just slide a palette knife under them to separate them from the parchment.

To make the orange tahini cream, first beat the tahini and cream cheese together in a large bowl with a large metal or wooden spoon.

When smooth, add the icing sugar and beat again until smooth.

Next add the orange zest and mix to thoroughly combine.

Finally, add the cream and continue to beat just until the filling is smooth, creamy and able to hold its shape.

To assemble the sandwiches, pair the cookies and turn them so that the flat side is facing upwards.

Place a good dollop of filling in the centre of half of the upturned cookies and spread it gently towards the edges using an offset palette knife. Don't spread the cream right to the edges though as it will ooze out, so leave a small rim.

Place each matching cookie on top of the ones that have the cream on them and very gently press them together.

Your cookies are technically now ready to eat, but if you have the patience, I much prefer them after they've been chilled in the fridge and the cream filling has set a little. At this point, the unctuous gooey chocolatyness reaches new heights. They'll keep in the fridge for a few days.

Friday 13 October 2017

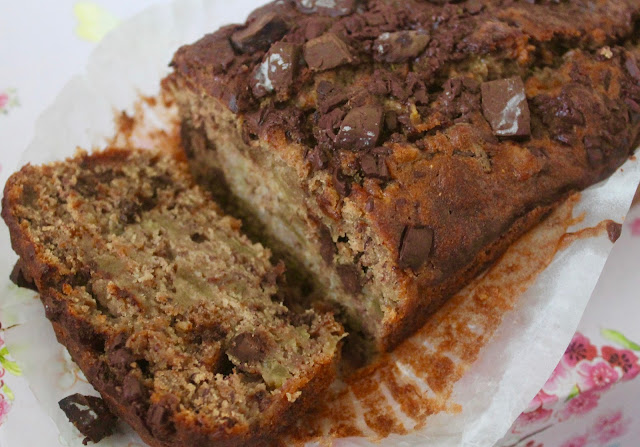
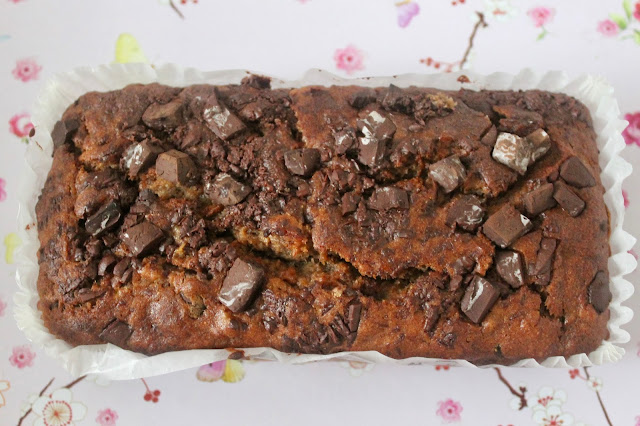
Pear, chocolate and maple syrup banana bread

Pear, chocolate and maple syrup banana bread

Would that I had green fingers. Well, when I say this, what I mean is, I like the idea of having green fingers and pottering about in the garden for hours on end. The actuality is I have neither the time nor the inclination, and the only reason I like the idea is - you won’t be surprised to hear - food. I find myself musing over how wonderful it would be to grow one’s own food: a garden full of fruit trees for every type of crumble imaginable; a vegetable patch for making lovely salads and sides; an abundance of roots growing under the mud, ready to be harvested when in season.

Pear, chocolate and maple syrup banana bread

The reality is we have one, very sad and lonely apple tree in our garden, which yields literally about four smaller-than-an-atom apples a year (if we are lucky!) and I am incapable of keeping even herb plants alive. Unfortunately for me, I think I must accept that nutritional self-sufficiency is not within my grasp.

Pear, chocolate and maple syrup banana bread

My lack of horticultural prowess is generally something I’m okay with, but a couple of recent trips to a beautiful B&B on the Suffolk coast did make me somewhat wistful. The owners of the B&B are keen gardeners and grow their own of more or less everything! Their garden is an absolute delight; full of fruit trees, vegetables, beautiful flowers, wild meadow areas and so much more. Luckily for me, on our visits, they had more produce than they knew what to do with, so I got some goodies to take home! Our summer sojourn yielded punnets full of plump, red-as-ruby cherries, whilst our latest stay in autumn saw us taking home a haul of cooking apples and conference pears!

Pear, chocolate and maple syrup banana bread

Whilst the cherries have long been eaten and the apples have been stewed for my twice-baked crumble, I decided to try something new with the pears. Given it’s October, I wanted something immediately reminiscent of autumn – something warming and comforting as the nights become longer and the weather turns decidedly chillier – and this recipe is just that. Full of spices, pears and chocolate, eating this cake made me think of crisp leaves crunching under my feet, bonfires and cosy jumpers! The ingredients are brought together into a sponge that’s gorgeously damp and moist thanks to the bananas and maple syrup. This cake is my happy place on a plate.

Pear, chocolate and maple syrup banana bread

P.S. I suspect pouring some cold cream or warm custard over a slice could further enhance the comfort factor...

Pear, chocolate and maple syrup banana bread

Adapted from Delicious magazine’s Pear and maple syrup banana bread

Yields 10-12 slices
  • 3 ripe bananas
  • 100g unsalted butter, melted, plus extra for greasing
  • 70g golden caster sugar
  • 2 small, ripe but still firm pears, peeled, cored and diced fairly finely, dusted in a little flour (I used conference, but I'm sure any would do)
  • 1 tbsp maple syrup, plus about another 2 tbsps for drizzle
  • 1 tsp vanilla extract
  • 1 large free-range egg
  • 150g plain flour
  • ½ tsp bicarbonate of soda
  • 2 tsps cinnamon
  • 1 tsp ginger
  • 1 tsp mixed spice
  • 100g plain chocolate (40%), roughly chopped

Heat the oven to 180C or 160C for a fan oven. Grease and line a 1 litre loaf tin with baking paper or, for a much easier life, use a silicone loaf tin or the pre-made paper loaf liners!

Mash the bananas in a large bowl with the back of a fork, then stir in the melted butter and caster sugar. Beat them all together with a large metal spoon to combine.

Stir through the diced pears, maple syrup and vanilla extract; then beat in the egg.

Sift the flour, bicarbonate of soda and the spices, then gently fold them in to the large bowl of ingredients, along with the chopped chocolate, using the metal spoon. Fold until all of the dry ingredients have been fully incorporated.

Spoon the mix into the loaf tin, then bake for 45 minutes. The cake should be dark on top with a soft sponge. To check if it's fully baked, stick a skewer or sharp knife into the centre – it will come out clean if the cake is done.

Once you've taken the cake out of the oven, whilst it's still warm, skewer the top of it in a few places, either with a sharp knife or a metal skewer, then drizzle some more maple over the top (I probably drizzled about 2 tsps' worth).

Leave to cool in the tin for 10-20 minutes, then lift out onto a wire rack to cool completely.

Wednesday 27 September 2017

Banoffee chocolate pasta

Banoffee chocolate pasta

If you're anything like me and Dr D, your larder, kitchen cupboards and fridge will be full of ingredients that you bought eons ago and have never gotten around to using. Currently we have, amongst other things: sour cherries; grape jam; black and green olive savoury marmalade (your guess is as good as mine); spiced balsamic onion chutney; and chocolate coconut hazelnut butter. All unopened. Until not long ago, chocolate pasta could have been added to this list.

Banoffee chocolate pasta

Yes, that's right, I said chocolate pasta.

Banoffee chocolate pasta

I bought said pasta just over two years ago during honeymoon part I to Italy, and as soon as I saw it, I knew I had to have it (a bit like many other women are with Manolo Blahniks, one imagines). Trouble is, I didn't have a clue what I had to have it for, simply that it must be mine (again, the Blahniks spring to mind...) Months passed by, then years and my poor packet of chocolate pasta remained on the shelf, untouched and probably feeling somewhat unloved (because we all know pasta has feelings).

Banoffee chocolate pasta

Finally, I decided enough was enough... or rather, the impending best before date decided for me. So out came my packet of beautifully brown corkscrew-shaped fusilli.

After a fair bit of research, I realised there weren't many suggestions out there for what to do with chocolate pasta - possibly why I'd ignored my own packet of it for so long! That was until Nigella came to the rescue. Naturally.

Banoffee chocolate pasta

On her website, the eternally beautiful cook (have I mentioned before that she's everything I wish to be and more?!) throws some penne chocolate pasta together with a caramel and pecan sauce. I could see that this would work but I didn't want the texture of crunchy pecans with soft pasta and preferred the idea of an unctuous banoffee chocolate caramel sauce coating my chocolate pasta twirls. I also added the zest and juice of a lime as I felt this complemented the banoffee chocolate well, but you can leave it out if you prefer. Nigella serves hers warm with cream on the side, but I made mine as a chilled dish, with whipped double cream on top. Opt for whichever of these two you like - warm or cold. Either way it's as comforting as you can get on a cold autumnal day!

Banoffee chocolate pasta

P.S. Chocolate pasta isn't easy to come by, so if ever you needed an excuse to go to Italy, I think you now have one. You're welcome.

Adapted from Nigella's Chocolate pasta with caramel and pecans
Serves 8-10
  • 100g unsalted butter, softened
  • 100g soft dark brown sugar
  • 200ml + 400ml double cream
  • Pinch of Maldon salt
  • 100g dark chocolate (70% cocoa), broken up into smallish pieces
  • 2 ripe bananas, sliced
  • Zest and juice of 1 lime (optional)
  • 250g chocolate pasta
  • Pinch of table salt
  • Cocoa powder for dusting
Place the butter and sugar together in a large non-stick frying pan and heat gently, stirring with a wooden spoon every now and then. As the two start to break down, turn the heat up to medium. The butter will start to foam and the foam will turn from white to brown. Continue to stir, bringing the mixture to a simmer.

After a couple of minutes of simmering, the butter and sugar mix should have thickened and turned into a treacle-like syrup. At this point, pour in the 200ml of the cream, setting aside the other 400ml for later.  Be careful as it may bubble up or spit. Add a pinch of Maldon salt and continue to stir, bringing the caramel mixture back to a simmer and allowing it to bubble away gently for a couple of minutes, before turning off the heat.

Now tip the dark chocolate into the caramel and stir, allowing the chocolate to melt in the heat.

Once the chocolate has fully melted, add the banana slices, lime zest and juice and gently stir once more so that the chopped banana is fully enrobed in a glossy coat of shiny, chocolaty caramel and the lime juice is thoroughly mixed into the chocolate caramel.

Put water on to boil for the pasta. When it’s boiling, add a pinch of table salt and cook the pasta. Mine didn't have instructions on the packet for how long to cook it, so I went with 2-3 minutes, which left it firmly al dente. You could cook for a minute longer if you prefer softer pasta, but it will soften more with time anyway so beware of it turning to mush.

Once cooked, immediately drain the pasta, then tip it into the frying pan of banoffee chocolate sauce and give everything a good stir before transferring it into your serving dish and allowing it to cool fully. 

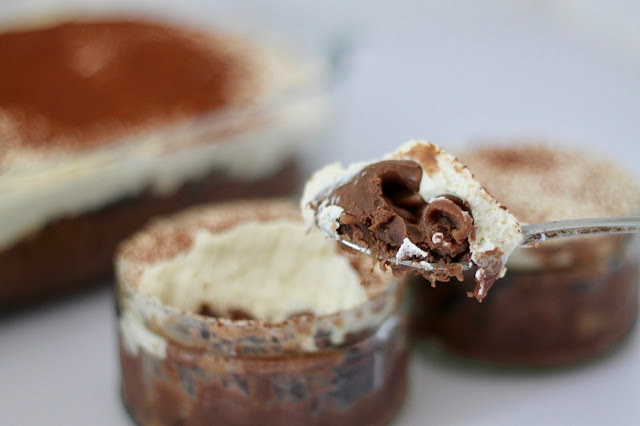
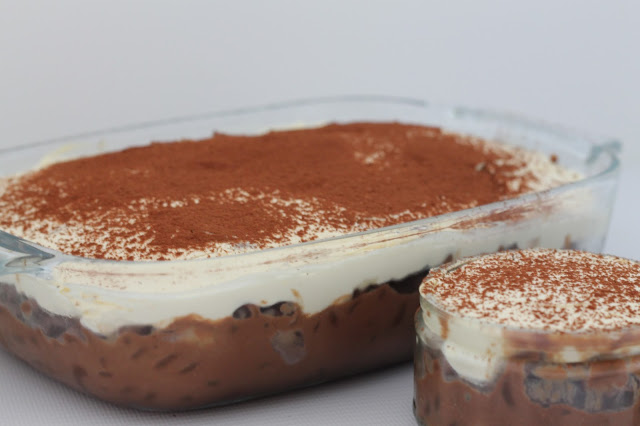
Whip the 400ml double cream to soft peaks, before spreading over the top of the cooled pasta. To finish, cover the cream with a light dusting of cocoa powder.

Thursday 24 August 2017

Chewy triple chocolate chunk cookies

Chewy triple chocolate chunk cookies

When it comes to chocolate chip cookies I have pretty exacting standards. Let’s examine:
  1. They must be soft and chewy. A crisp outer edge is allowed, but beyond that, absolutely no crunchiness, no sand-like crumbliness (save it for shortbread), no sogginess and definitely no dryness please.
  2. They must have a high chocolate chunk to cookie dough ratio. Let’s go with about 50:50 for the sake of argument.
  3. Despite the name, I want sturdy, brick-like chocolate chunks populating my cookie - something with a bite, not barely-there chocolate chips that dissolve on the tongue before you’ve even realised they were in the cookie.
  4. Like the chocolate it is studded with, the cookie should be chunky and solid. I want a body-builder of a cookie not a waif-like thin one.
  5. Ideally they should be eaten with a big glass of cold milk for accompaniment, whilst one is in one’s pyjamas.
Chewy triple chocolate chunk cookies

Sadly, I find it hard to get cookies that meet my requirements when frequenting cafes and coffee shops - even after I’ve made allowances for that fact that they probably won’t let me in in my pyjamas - so I was delighted when I visited Mast Brothers in Shoreditch, East London, a year or so ago. I found that they did the most amazing chocolate chip/chunk cookie I’d ever tried outside of homemade ones and that it met all of my criteria (at £3.50 a pop, there would have been a strong degree of indignation had it not). As there was no seating, I even got to take my precious cookie home and eat it whilst in the comfy-cosiness of my PJs. Good times!


Chewy triple chocolate chunk cookies

Unfortunately, these good times were short-lived, as Mast Brothers closed their London shop earlier this year (I'm not sure why, other than maybe most people weren't willing to pay £3.50 for a cookie...?) I’d imagine they may still sell their cookies in their other shops, but this would require me flying all the way to the States to buy one. Suddenly £3.50 for a cookie is looking rather reasonable…

Chewy triple chocolate chunk cookies

Oh well, I guess this means I’m back to square one when it comes to my perfect shop-bought cookie hunt. In the interim I continue to bake my own. The latest are these triple chocolate cookies. They deliver on points 1-4 of my criteria. I’m trusting you to deliver on point 5.


Chewy triple chocolate chunk cookies

Adapted from Sainsbury's double chocolate cookies
Yields 24-25 cookies

  • 250g unsalted butter, melted
  • 100g caster sugar
  • 100g light brown soft sugar
  • tbsp condensed milk (I used sweetened)
  • 250g self-raising flour, sifted
  • 100g cocoa, sifted
  • Pinch of salt
  • 300g plain, milk and/or white chocolate, cut into chunks
  1. Preheat the oven to 150°C (fan oven).

  2. Using an electric hand whisk or mixer, cream the butter and sugars together until they are fully combined.

  3. Beat in the condensed milk, then add the flour, cocoa and salt, and beat again.

  4. Stir in the chocolate chunks.

  5. At this point, I always like to leave my cookie dough to chill in the fridge for at least a couple of hours, but preferably overnight (or even a couple of days if you wish), as it yields a chewier cookie, but if you don't have the time (or the patience!), you can skip the chilling and move straight on to shaping and baking.

  6. Roll the dough into walnut-sized balls and space at least 5cm apart on a baking sheet, then flatten a fair bit with the palm of your hand. I get about nine on a sheet and bake them in batches but if you want to bake on a couple of sheets at the same time, do so. Bake for about 12 minutes. When you take them out of the oven, they will still be very soft, especially in the middle, so don't pick them up right away. Instead, leave to cool for a few minutes before transferring to a wire rack.

Monday 24 July 2017

Eton mess cheesecake


Someone recently informed me that our taste buds change every few years, which means food we might not have liked previously can suddenly and inexplicably become agreeable to us. This leaves me both pleased and peevish: pleased because it means there is more food in the world for me to rejoice in eating; peevish because my hips do not need more food in the world for me to rejoice in eating.


The discovery about our taste buds serves to explain why over the last year I have come to love meringue, in particular when it comes with lashings of whipped cream and fruit. Historically, it’s something that I’ve always turned my nose up at, feeling it was nothing more than bite after bite of pure sugar. I still remember to this day visiting a friend for dinner years ago and being so excited about dessert, only to find out she’d made us huge sundae glasses full of Eton Mess. My heart sank and I politely ate a couple of mouthfuls of it before making the wholly implausible excuse that I was too full to possibly eat any more (me, full? Yeah, right!) Oh, how immature my taste buds were back then.


Nowadays, I find myself positively craving meringue as a dessert. So much so that when Dr D recently took me to The Ivy (dah-ling!) for a celebratory meal, I dismissed all of the desserts I would usually drool over: salted caramel fondant with crème fraiche; burnt banana and butterscotch tatin – next time tatin, I promise, next time!; and cherry and almond pie. Instead, I knew immediately that I wanted the pavlova. Whooooaaaa Nelly, was it a good choice! One of the best desserts I’ve eaten at a restaurant. Ever. Even the fact that Michael Sheen was sat a few tables down from us couldn’t deter me from shamelessly digging into my pud with gusto.


This recently-acquired taste of mine means that when I came across the idea of an Eton Mess cheesecake, it was something I knew I wanted to make. My version has a thicker biscuit base than standard cheesecakes because, as I’ve said in the past, generally I find the cheese to biscuit ratio in cheesecakes too high, leaving me feeling cheated of Digestive; we none of us should be cheated of Digestive. After that, it’s a pretty simple process of mixing up the cheese filling and adding in the flavour combinations you might want (in this instance lemon and raspberry), before the crowning glory – the Eton Mess topping.


This is a fun dessert to make: it’s easy, with no baking required, and it looks and tastes great. Make it. Make it now.

Adapted from Olive magazine's Eton mess cheesecake

For the cheesecake:
  • 400g Digestive biscuits (Graham Crackers)
  • 120g unsalted butter, melted
  • 300ml double cream
  • 220g full-fat cream cheese
  • 250g mascarpone
  • 250g lemon curd
  • 200g raspberries
For the Eton mess topping:
  • 300ml double cream
  • 2tbsp icing sugar
  • 200g lemon curd
  • 225g raspberries
  • 3-4 palm sized meringues, broken into pieces

To make the cheesecake, roughly break up the Digestive biscuits into a food processor and then blitz into crumbs. Pour in the melted butter and blitz again to combine so that the biscuits have a sand-like texture.

Tip the biscuit mixture into a 20cm loose-bottomed springform tin and press down with your fingers to create a tightly-packed and even biscuity base. Chill in the fridge whilst you make the cheese filling.

Place the double cream, cream cheese and mascarpone in a large bowl and beat them together with a spatula or a wooden spoon until combined and thick but not too stiff.

Fold in the lemon curd until mixed in.

Spoon about half of the cheese filling into the tin, spreading it as evenly as you can over the biscuit base.

Next scatter over the raspberries, pushing them down a bit into the cheese, before spooning on the remaining cheese filling. Again, spread it as evenly as you can using a spatula or an offset palette knife.

Place the cheesecake back in the fridge to chill and set for at least 3-4 hours; preferably overnight.

To make the Eton mess topping, whip the double cream with 1tbsp of icing sugar to soft peaks (it should be thick but happily plop off a spoon).

Gently fold in the lemon curd using a large metal spoon or a spatula.

Separately, in a small bowl, using a fork or the back of a spoon, mash about 100g of the raspberries with the other 1tbsp of icing sugar to make a puree.

Just before you are ready to serve the cheesecake, remove it from the fridge and, carefully taking it out of its springform tin, place it on a serving dish.

To finish, pile the whipped lemony cream, meringue pieces and remaining berries onto the middle of the cheesecake (push some of the meringue pieces and raspberries into the cream as you're piling it all on). Lastly, drizzle or spoon over the puree.

Tuesday 13 June 2017

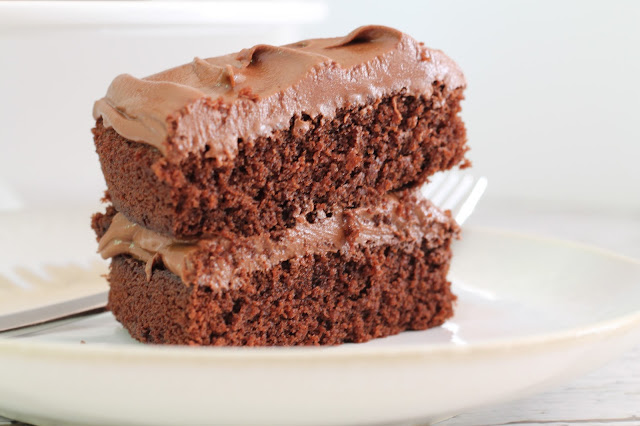
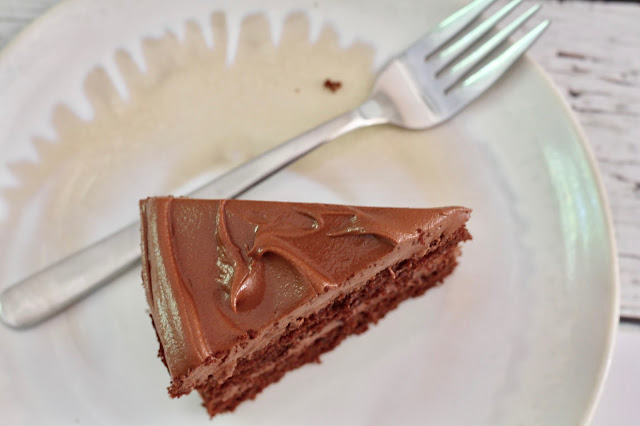
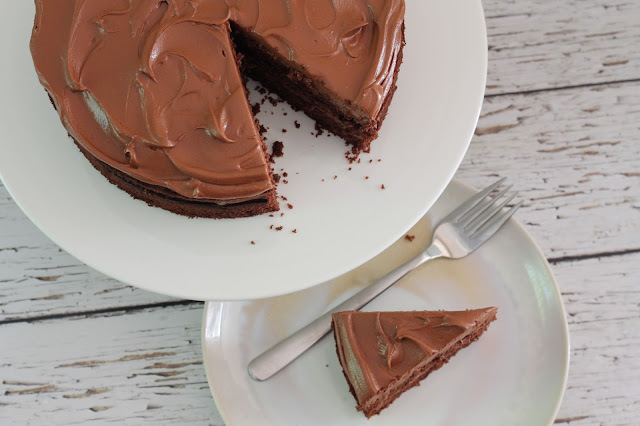
Easy-peasy chocolate orange fudge cake

Easy-peasy chocolate orange fudge cake

Do you ever feel you've bitten off more than you can chew? And I don't mean in the literal sense (goes without saying that this is something I do all the time, in my eagerness to squish as much food into my mouth at any given moment).

Recently I realised that I was taking on a couple of fairly major new projects in my life, in addition to continuing with my day job, my Spanish lessons and also embarking upon Ramadan, which coincidently is again at the toughest time of the year, when the days are so long, you have about a four-hour night-time window in which to eat and drink before fasting starts all over again.

Easy-peasy chocolate orange fudge cake

To be honest with you, the lack of food and drink I can cope with, it's the perpetual broken sleep that is the killer (makes me realise how new parents must feel!) Waking at 2.30am for suhoor (pre-sunrise meal), waking again an hour later because at 2.30am I tried to drink enough water to keep me going for the next 19 hours and am now paying for it, waking another couple of hours later because my body is still processing all that water, and then finding that before I know it, it's time to wake up for work. Uff! Since the fast doesn't break until about 9.20pm, it means bedtime is also pushed back waaaay beyond my usual 9.30pm deadline, to allow me sufficient time for aforementioned food squishing.

Easy-peasy chocolate orange fudge cake

Anyway, Ramadan, combined with my new projects... well suffice to say, it's been a test. This is particularly so because one of the projects is that I'm now officially a tour guide giving chocolate tours around London! The best job in the world? I'll let you know when I get to give a tour during which I'm not on a 19-hour fast and don't have to stand there watching others scoff truffles and pralines whilst I count down the hundreds of minutes until I might be able to do the same!

Easy-peasy chocolate orange fudge cake

Let me not sound ungrateful though. Working in food is something I've always wanted to do, so leading people on chocolate tours of some of the best chocolate shops in the best city in the world is a dream come true for me. Furthermore, I also love Ramadan. As hard as it is; as much of a mardy bum I become without sustenance (poor Dr D will testify to this), it's one of the most special times of the year for me and I invariably miss it when it's over.

During such times - when you don't get to eat what you want, when you want - times when you are abstaining from all food and drink for 19 hours at a time, 30 days in a row, there comes a need for a particularly delicious and yet simple cake. A cake that is ridiculously easy to make and will be there, patiently waiting for you at the end of the fast, ready to give you a much-needed chocolate huggy-wuggy. This is that cake.

Easy-peasy chocolate orange fudge cake

It's called an easy-peasy cake because it really is one of the easiest cakes in the world to make. One simply places everything into a food processor and whizzes it around for a couple of minutes. Even those who protest they can't bake for toffee could make this cake! I added orange into it because, well, in case you haven't learnt anything about me by now, it's that I love chocolate orange and this cake was my treat for all the fasts, but if you truly object, sub the orange extract for vanilla. Pah, what's it to me, you're the one who'll miss out. 

Adapted from Olive magazine's Easiest ever chocolate fudge cake


For the cake:
  • 150g self-raising flour
  • 30g cocoa powder
  • 1 tsp baking powder
  • 175g light muscovado sugar
  • 175g unsalted butter, softened
  • 60ml sunflower oil
  • 60ml plain yogurt
  • 30ml cold water
  • 3 large eggs
  • 20ml/4 tsps orange extract (or 2-3tsps of vanilla extract if you don't like chocolate orange)
  • 50g dark chocolate (70% cocoa), melted
For the fudge icing:
  • 200g unsalted butter or Stork/margarine, softened
  • 200g icing sugar
  • 200g plain chocolate (40% cocoa), melted
Preheat the oven to 160C (fan).

Grease the base and sides of two 8"/20cm round sandwich tins and then line the bases of both tins with discs of greaseproof paper.

To make the cake, bung all of the cake ingredients into a food processor (you don't even have to sift the dry ingredients, just tip them in), and whizz together for a couple of minutes until you have a nice, smooth cake batter with a soft, dropping consistency.

Divide the mixture equally between your two tins, smoothing the tops out evenly with a palette knife.

Bake on the middle shelf of the oven for 25-28 minutes, until the cakes are springy to the touch and a knife inserted into the middle of them comes out clean.

Allow the cakes to cool in their tins for 5-10 minutes, then transfer onto a wire rack to cool completely.

For the icing, place the butter and icing sugar into the food processor (I shall presume you've been sensible enough to have washed this already after using it to make the cake batter). Again, no need to worry about sifting the icing. Whizz until throughly mixed together and creamy and soft. Add in the melted chocolate and mix again for about a minute, until you have a beautifully soft, chocolaty icing.

To assemble, once the cake are cool, place one of the sponges upright on your serving plate. With a palette knife or spatula, evenly spread about half of the icing over the top of the sponge.

Place the second sponge on top of the iced first sponge and gently press it down so that it sits comfortably and isn't sliding around. Cover the top with the remaining icing, swirling the icing as you go, to create a nice pattern.

Serve straight away or store in an airtight tin at room temperature.

Tuesday 11 April 2017

Salted almond butter and orange truffles (gluten free)


I once decided, in what was clearly a mahoosive fit of self-delusion and naivety about my willpower, that I should give up chocolate for a while. My abstention lasted all of about eight hours.

The problem is, quite simply, when it comes to chocolate, I am weak - who am I kidding, when it comes to pretty much all food I am weak, but with chocolate I am particularly susceptible and so, since my failed abstinence, I have come to terms with the fact that it is likely to feature in my life on a more or less daily basis. And it does.


Recently I went on a chocolate tour. In case you're wondering what the ecky-peck a chocolate tour is, in a nutshell it involved visiting some of the highest-quality chocolate shops in London and sampling their delights (whilst also learning about the history of chocolate). The hardship!

I'll admit that I was already familiar with every single one of the shops we visited, but that didn't matter a fig, I was more than happy to return as part of the tour, tasting a variety of cocoa-based goodies, from chocolate made with 100% cocoa (bitter, but very good for you!), to violet creams (think melty Parma Violets enrobed in dark chocolate) to a wondrous, Willy Wonka-esque blood orange, basil and honey truffle.


Upon reflection, I realised that during my tour I'd made my way through about 30 bonkersly delicious truffles, pralines and ganache-filled chocolates in the space of about three hours (umm... and also a hot chocolate!) If you're thinking that after that, I must surely have had my fill for at least a day or two, oh how you underestimate me! I was ready for more by that evening. 


Having been on the chocolate tour, I felt inspired to make some of my own chocolates. Truffles, generally speaking, are a doddle to make (equal amounts of cream and chocolate heated and mixed together, then rolled into balls) and you can really have fun, playing around with flavours and fillings (as per my chocolate orange biscuit truffles).


In this instance, the truffles I made were a total experiment in terms of the flavour combination, but happily, the experiment was a success; the truffles were delicious, particularly straight from the fridge, after their chocolate coating had set to form a solid, thick, crispy shell (note, the ones in my photos have not fully set). Alternative nut butters could be used if you're not a fan of almond. Similarly, I think lemon or lime would work a treat in place of the orange zest.

Loosely based on Daylesford Farm's Salted Almond Butter truffles
  • 200g pitted dates
  • Zest of a large orange
  • Jar of almond butter (I used Pip and Nut)
  • 300g chocolate (I used 45-50% but you can go darker or lighter depending on personal preference)
  • 50g unsalted butter
  • Maldon salt
Line a tray (which will fit into your freezer) with greaseproof paper.

Place the dates and orange zest in a food processor and blitz until it all comes together in one big ball.

Take a teaspoonful of the date mixture and roll it together in the palm of your hands to form a round ball.

Use your little finger or ring finger to press into the centre of the ball to make a well (the end of a wooden spoon might work too). Fill the well with about half a teaspoon of almond butter, then place the ball on the lined tray (with the well of almond butter facing upwards, otherwise it will slowly ooze out!) Beware, this is all a rather sticky, messy process and you will end up with date mixture and probably some almond butter all over your hands!

Repeat until all of your date mixture has been used up, then place the tray in the freezer for at least an hour.

When ready to coat the truffles, place the chocolate and butter in a large bowl and melt in a bain marie (place the bowl over a saucepan of simmering water, ensuring the water is not high enough to come in contact with the base of the bowl, otherwise your chocolate will split). Alternatively, melt in short bursts in the microwave.

Once the chocolate and butter have melted and combined into a delicious, glossy gloop, remove the balls from the freezer. Skewer each one with a toothpick or a thin wooden BBQ skewer and dunk it in the chocolate to coat.

On dunking: note that some of the almond butter may soften in the heat of the chocolate and ooze out a bit. This doesn't matter; in fact, I found it made the end truffles look even more enticing, as there were ribbons of salted almond running through the chocolate coating. Also, my chocolate was quite thick after melting, rather than runny, so each truffle got a generous coating of it, but if you feel your chocolate coating isn't thick enough, you can give the truffles a second dip after the first coat has set a little.

Place the truffle carefully back on the lined tray and sprinkle with a few flakes of Maldon salt before the chocolate hardens (if giving a second coat of chocolate, sprinkle the salt over once you've done the double dunk).

Repeat with all the balls, then place them in the fridge to allow the chocolate to set fully.