Wednesday 14 December 2016

Cranberry, pecan and orange mince pies (vegetarian and alcohol-free)

Cranberry, pecan and orange mince pies (vegetarian and alcohol-free)

Ever think you’ve been given bum advice? Growing up, I was raised to play it safe when it came to a career: “Be a doctor or a lawyer or an accountant. All of the above, even! That way you’ll always have money and status and respect.” All the things that matter, obviously.

When choosing my A-level subjects, I was even told by someone that I should throw in Chemistry alongside English and my foreign language choices - the subjects I truly loved - just in case I saw sense at some point and decided yes, medicine was my true calling. I wilfully ignored this advice; indeed, I ignored all the aforementioned exciting career options, but I did nonetheless go for the staid, ‘safe’ option of a conventional office job.

Cranberry, pecan and orange mince pies (vegetarian and alcohol-free)

Recently I’ve become aware of other women who have been much braver than me and actually pursued their dreams so that they have careers that truly fulfil them, no matter the risk, nor for that matter, the lack of status and respect that supposedly come with being able to sue people or help clients find tax loopholes. One is a published writer; the other runs her own, very beautiful boutique B&B.

I don’t think I’d be much good at either of these two things, but gosh do I envy the women who are doing them. I envy them for having the guts to follow their dreams and believing in themselves enough to do it, for every time I even vaguely consider what I might really like to do with my life, that “play it safe and stick with a regular job” advice pops into my head to knock some risk-averse sense back into me.

Cranberry, pecan and orange mince pies (vegetarian and alcohol-free)

I tell you this because at a party a couple of weeks back, I took along a selection of homemade cakes for dessert and, unbeknownst to me, the professional caterers who were supplying the main course snuffled away a fair bit of said cakeage. I only became aware of this fact when they approached me at the end of the party to tell me that they loved my cakes so much, they felt I should go into baking professionally and would I be interested in working with them! Whilst Dr D tells me all the time that I should bake professionally, I still couldn’t quite believe it when I heard the same thing from the caterers.


Cranberry, pecan and orange mince pies (vegetarian and alcohol-free)

Whether I will be brave enough to take their (and my husband’s) advice remains to be seen. Maybe one day I will become like the writer and the hotel owner whom I admire so much and have the courage to pursue my dreams. Meanwhile, I shall continue to find happiness in baking for you and hope that you enjoy my recipes as much as the caterers did. Which leads me nicely onto these beautiful mince pies…

Cranberry, pecan and orange mince pies (vegetarian and alcohol-free)

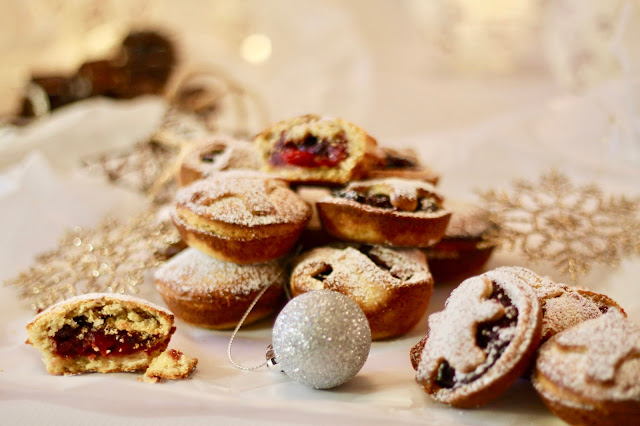
Every Christmas I say to myself that I will try making my own mince pies, especially as it’s not all that easy to come across decent vegetarian, alcohol-free ready-made ones. But then I get lazy and so the house remains pie-less.

This year though, I actually did it and, contrary to my expectations, they weren’t at all laborious or time consuming to make. The mincemeat took about half an hour in total, then I just popped it into a jar to develop in flavour for a few days. The pastry took about the same length of time and was surprisingly easy to make, coming out beautifully crisp and buttery. All that remained was assembling the pies, which I had a lot of fun with, making different shapes and decorations (instructions are given in my recipe). Well worth the couple of hours in total and ridiculously yummy.


Cranberry, pecan and orange mince pies (vegetarian and alcohol-free)


Yields 12-15 mince pies

For the mincemeat (based very loosely on Nigella's Cranberry-studded mincemeat) - I'd recommend making this 2-4 days ahead of time, then store it in a sterilised jar in the fridge to allow it to deepen in flavour. To sterilise your jar, wash it in warm soapy water, then allow it to dry in the oven for a few minutes on a low temperature (about 120C fan):

  • 90g soft dark brown sugar
  • 150ml fresh orange juice
  • 300g fresh cranberries
  • 2 tsp mixed spice
  • 1 tsp ground cinnamon
  • 1 tsp ground ginger
  • 250g mixed dried fruits (currants, sultanas, raisins, cranberries)
  • Zest and juice of one clementine
  • Zest and juice of one lemon
  • 1 cooking apple, peeled, cored and finely diced
  • 50g butter
  • 50g pecans or almonds, finely chopped
  • 8-10 drops almond extract
  • ½tsp vanilla extract
  • 2 tbsp honey
Place the sugar and orange juice in a large, heavy-based pan over a low heat.

Once the sugar has dissolved, tip in the fresh cranberries and stir.

Allow to cook on a very gentle heat for about 10 minutes; as the cranberries start to soften, squash them with the back of a wooden spoon.

Add the spices, mixed dried fruit, juice and zest of the clementine and lemon, diced apple, butter and chopped nuts into the pan and stir.

Bring the mincemeat to a simmer and leave to cook for about 20 minutes or until the fruit has broken down and absorbed most of the liquid. Stir every now and then to ensure the mixture does not stick to the bottom of the pan and whilst stirring, continue to squash the fresh cranberries.

Once cooked, remove from the heat and allow to cool for a few minutes, then add the almond and vanilla extracts and the honey and give one final stir.

Store the mincemeat in your sterilised jar in the fridge until ready to make the pies.

For the pastry (adapted slightly from Dan Lepard's mince pie pastry recipe from Short and Sweet):
  • 200g plain flour
  • ½tsp baking powder
  • 75g golden caster sugar
  • 100g unsalted butter, cold and cut into cubes
  • 100g full-fat cream cheese
  • 50g ground almonds
  • 1 large egg yolk
Sift the flour, baking powder and sugar into a large bowl.

Add the cubes of butter and with your fingertips, gently rub the flour and butter together until you have a lump-free sandy mixture.

Tip the cream cheese, ground almonds and egg yolk into the bowl and with a blunt knife, cut through the ingredients to bring them together a little. When it starts to all mix together and go clumpy, using your fingertips again, start rubbing the ingredients together again. I found that I couldn't rub in all of the yolk and cream cheese completely, but this wasn't a problem, the clumps all soon combined to form one soft, smooth ball of dough.

You shouldn't have to knead the dough, but if you find it is stiff (hopefully it won't be at all), you can add a very tiny amount of milk to soften it and gently knead the dough briefly to combine it with the milk.

Wrap the dough in clingfilm and chill for at least 30 minutes.

To make the pies (the fun part!)

Preheat oven to 190c (fan).

I worked with half of the pastry at a time, keeping the other half wrapped in clingfilm in the fridge.

On a dry, clean work surface roll out the pastry to about 3mm thick. I rolled mine out onto a silicone baking sheet, which meant I didn't have problems with it sticking.

Generously butter the pockets of a muffin tray (shallow or deep - I used one of each and found both worked well).

If you want round pies with proper lids, you will need a 7cm and an 8cm round pastry/biscuit cutter. Using these cutters, cut out as many 8cm and 7cm discs as your pastry allows - but ensure you have equal quantities of both sizes. You may need to re-roll leftover clumps of pastry to get as many discs out of it as possible. Scroll down to the bottom for instructions of different pie shapes (including if you don't have cutters).

Place the 8cm discs over the buttered muffin pockets and gently push them down into the pockets, then fill with mincemeat. I was cautious with mine, only filling them to about three-quarters, for fear that the juice of the mincemeat would bubble out and/or burn when baking, but actually I found this didn't happen at all and that I could have been more generous with the filling, so personally I would fill the pastry as much as possible if following this recipe.

Next, brush the rims of the filled pastry cases with water or egg white and cover with the 7cm discs, gently pinching the edges to seal the lid to the cases.

Poke a small slit into each lid with a sharp knife, to allow steam to escape during baking.

Repeat the process with the other half of the pastry still in the fridge until you've used it all up.

Bake the pies on the middle shelf of the oven for 15-20 minutes, until lovely and golden.

Allow the pies to cool in the muffin tray for five minutes before removing from the tray and placing on a wire rack to cool completely. If you find that the pies are a bit stuck in the muffin pockets, run an offset palette knife around the rim before gently prising them out with the same knife.

Sprinkle liberally with icing sugar before serving.

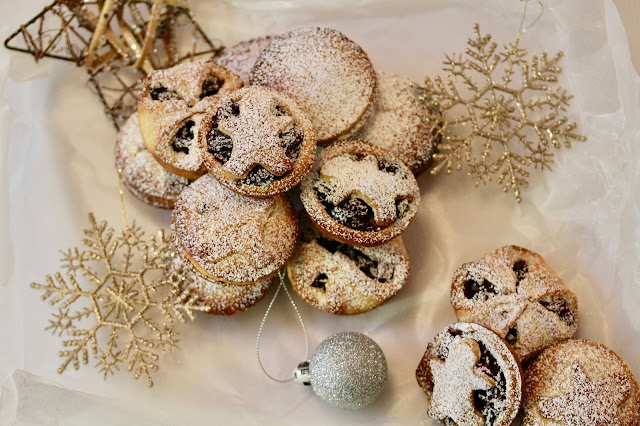
If you don't want a round pie lid, instead of 7cm discs, you can cut other shapes out of the pastry to place on top of the mincemeat, such as stars, Christmas trees, or like I did for some of mine, gingerbread men. Since these won't completely cover the pie or make it air tight, you won't need to cut a slit in the lid for steam to escape.

If you don't have round biscuit cutters, you can make mince pie parcels: Roll the pastry into a large rectangle, then gently place the whole rectangle over the muffin tray. Cut the pastry into squares just larger than the muffin pockets, then gently push each square down into its pocket and fill with mincemeat. Finally, bring all four corners of the square into the middle of the pie and pinch together, sealing with a little water or egg white. Again, you won't need slits in these parcels as there'll be gaps for steam to escape. You can watch a how-to video for mince pie parcels on BBC Food's website.
Wednesday 26 October 2016

Triple chocolate and orange cookies


One of my favourite memories from when I was little - a food-related memory, obvners - is of the lady who lived next door to us making Bonfire Toffee every year for Guy Fawkes'/Fireworks Night and being kind enough to give some to mumma for me, my brother and twinny to happily rot our teeth on.

Being a ziggypiggy even at the tender young age of five, I suspect my poor siblings didn't get much of a look in with not just the toffee, but any food in the house. Still, I suppose that would explain why all the Asian auntie-jees, upon seeing twinny and I together would cast their critical eye over me before gleefully stating "Achaa [I see], so you're the chubby one".


Anyway, glossing over the kind, gentle auntie-jees with their innocuous observations and returning to toffee, sadly, as we well know, all good things must come to an end. We moved house, and for whatever reason, the next-door-neighbour refused to come with, meaning the ready supply of Bonfire toffee was no more. Hmph.


Now that I'm a fully-grown ziggypiggy, every year when Guy Fawkes' Night comes around, I hunt in vain for Bonfire Toffee and never seem to have any luck. Worse still, what saddens me is that instead of preparing for Fireworks Night, the supermarkets prefer, increasingly, to push Halloween. Since when did the Amreekanism of dressing up as ghouls and goblins and going trick or treating get so big here in the UK?

What's particularly galling is that a few years back, when my mum answered the door to some trick-or-treating teenagers, they rejected the sweets she kindly offered them and instead demanded money! Poor, naive K-Dub, robbed on her own doorstep by a bunch of ghosts! (I'm pretty sure I suggested to her at the time that we turn off all the lights and spend the evening in total silence so that any little treat-seeking opportunists would think no-one was home, but would she listen?!)


Despite my disapproval of the UK's new-found love for Halloween, I will acknowledge that not all American influences and imports are bad; it has also given us greatness. In no particular order, Chris Pine and cookies spring to mind.

Cookies. Which brings me neatly onto this recipe: one from my old girl-crush Nige. These are mahoosive mounds of ridiculously chocolate biscuit. I say biscuit because although technically they are chocolate chunk cookies, they're not chewy and are almost a little shortbread like in their crumbly texture. They require chocolate in three different formats, hence the name, and you can leave the orange zest out if you want, but that would just be silly of you. Enjoy.

Makes about 12 large cookies
  • 125g dark chocolate (70% cocoa)
  • 150g plain flour
  • 30g cocoa powder
  • 1tsp bicarbonate of soda
  • 1/4 tsp salt
  • 125g soft, unsalted butter
  • 85g soft, light brown sugar
  • 40g caster sugar
  • 1tsp vanilla extract
  • 1 large egg (cold from the fridge)
  • Zest of one large orange
  • 350g plain chocolate (40-50% cocoa), chopped
Preheat the oven to 170C (150C for fan ovens)

Break the 125g dark chocolate into large pieces in a bowl and melt either in the microwave or a bain marie, then set aside to cool a little.

Into another large bowl, sift together the flour, cocoa powder, bicarbonate of soda and salt.

Using either a freestanding mixer (with the paddle attachment) or a handheld electric whisk, beat together the butter and two sugars until light and creamy.

Add the melted chocolate to the butter and sugar mix and beat again until incorporated, then add the vanilla extract and egg and mix to combine.

Tip in the sifted ingredients and mix through, before finally adding the orange zest and chocolate chunks and stirring through once more until everything is combines.

Use a tablespoon or an ice cream scoop to measure out 12 large balls of dough and place them about 5cm apart on a couple of baking sheets. If the dough balls prove reluctant to come away from the spoon or scoop, a palette knife will help to prise them out. Don't worry about having nice, perfectly rounded balls of dough, you want them to be lumpy and bumpy. And don't flatten the tops of them!

Bake for 18 minutes, then leave to cool and set a little.

      Sunday 25 September 2016

      Nutella-caramel-Snickers chocolate cake

      Nutella-caramel-Snickers chocolate cake

      The last month has been a really rather wonderful whirlwind of first anniversary celebrations for me and Dr D. A delightful party with our nearest and dearest was followed by a few days in the countryside in a sumptuous hotel, an indulgent lunch at Raymond Blanc’s Belmond Le Manoir and then two very wonderful weeks away in Athens and Santorini.

      Yes, I know: a) we really milked the excuse to celebrate; b) we are extremely fortunate to have gone to some places that I’ve dreamt of visiting for a long, long time; and c) Dr D deserves some kind of medal for officially having put up with a bonkers wife for a whole year.

      Nutella-caramel-Snickers chocolate cake

      Needless to say, much food was consumed over the celebratory period and the best thing about it – apart from how good it was - was that it was food sourced and produced locally from the areas we were visiting: Cheddar cheese from (funnily enough!), Cheddar; beef reared in the Somerset countryside; olive oil produced from Greek olive groves; white aubergines and cherry tomatoes grown on Santorini; frozen yogurt made from authentic Greek yogurt etc, etc.

      Nutella-caramel-Snickers chocolate cake

      In Athens, we were told about a must-try Greek dish called BougatsaBougatsa is crisp, flaky layers of filo pastry, filled either with gooey, molten, chewy cheese or with cooled, set crème patissier and then some icing sugar and cinnamon sprinkled on top for good measure. We tried both variations, and loved both, so if you're heading to Athens any time soon, I would highly recommend seeking bougatsa out. I categorically deny that you will have to be rolled onto your flight home afterwards...!

      Nutella-caramel-Snickers chocolate cake

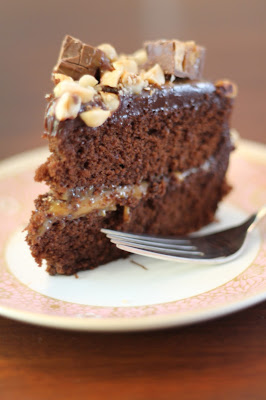
      Every time I go away on holiday, I invariably return thinking that I must try to recreate specific cakes, desserts and pastries that I’ve tried whilst away, but for whatever reason, I just never get around to it. I’ve even got an authentic Greek recipe for Bougatsa and yet, since my return, I haven’t yet managed to make it. Instead, I did get around to baking this Nutella and caramel-filled Snickers cake. What can I say, I had the post-holiday blues, so chocolate cake was required as a pick-me-up! 

      Nutella-caramel-Snickers chocolate cake

      The sponge of this cake is so light and fluffy, it would be great for a chocolate Vicky spOnj [sic], filled with some fresh cream and jam in the middle and served with a cup of chai. But I digress! On this occasion, I went all out and stuck Nutella and caramel in the middle, then slathered the whole thing with ganache and some more caramel before liberally sprinkling on some roasted hazelnuts and chopped Snickers pieces for good measure!

      Nutella-caramel-Snickers chocolate cake


      Note that this cake uses the all-in-one method of tipping all the cake ingredients into a bowl at the same time and whisking to combine, rather than beating eggs and sugar together first, then gradually adding everything else. I usually steer clear of all-in-one recipes as in the past I've found them to lead to dense, dry cakes, but I trust Jo from Jo's Blue Aga implicitly (she was a GBBO winner, after all!) so if all-in-one is what she says to do, that's what shall be done! I didn't even bother to sift my dry ingredients first - I just dumped everything into a large bowl and whizzed it all up with my electric handheld whisk. As I already mentioned, the sponge came out beautifully light and fluffy, and not the slightest bit dry. This is a cake I know I will make and eat with gluttonous gusto time and again!

      Adapted from Jo's Blue Aga Mars Bar Cake
      Yields 12-15 slices

      For the cake:
      • 200g Muscovado sugar
      • 200g stork or softened butter
      • 160g S/R flour
      • 40g cocoa
      • 50g Nutella
      • 4 eggs
      • 1 tsp baking powder
      • 50g sour cream
      For the filling:
      • 3-4 tbsp Nutella
      • 3 tbsp caramel sauce (I used Carnation tinned caramel)
      For the ganache and toppings:
      • 250ml double cream
      • 250g plain choc (40-50% cocoa)
      • 3-4 tbsp caramel sauce (Carnation tinned caramel again)
      • 3-4 Snickers bars chopped into small pieces (I used 41.7g bars, cut into five pieces each)
      • 55-65g hazelnuts toasted and chopped (to toast, place in a dry non-stick frying pan over a high heat. Keep an eye on them - they can burn easily! After about 3 minutes, start to shake the pan gently to roll the nuts around and allow them to toast evenly all over - another couple of minutes should do it. Once golden and emitting a nutty smell, remove immediately from the heat and tip onto a heatproof plate. Allow to cool before chopping up)


      To make the cake, grease the sides and bases of two 8 inch sandwich tins, then line the bases with greaseproof paper.

      Preheat the oven to 160C.

      Mix all of the cake ingredients together in a large bowl for a few minutes using either a free standing mixer or a handheld electric whisk (or indeed a normal handheld whisk if you prefer), until well combined, light in colour and fluffy.


      Spoon into the prepared tins and spread the batter gently with a spatula so that is evenly distributed and fills the tins.

      Bake in the preheated oven for 20-25 mins (mine came out perfectly at 23 minutes), or until a knife or skewer inserted into the deepest part of the cake comes away clean.

      Once out of the oven, allow the cakes to cool for 10-15 minutes before turning them out of the tins onto wire racks to cool completely. Remember to remove the greaseproof paper too!

      Make a ganache by breaking up the chocolate into a large heatproof bowl. Heat the cream in a saucepan on a low heat. Once it starts to simmer, pour it over the chocolate. Leave to sit for a minute, then stir gently with a spatula to melt the chocolate into the cream and combine until you have a smooth, glossy ganache. Allow to cool until it has thickened to the point that it is no longer runny, but is not so thick that you cannot spread it with a knife.

      To assemble, place one of your cold sponges onto your serving plate, spread first with the Nutella and then with the 3tbsp of caramel. Note, if the Nutella is too firm to spread, 
      heat it for a few seconds in a microwave or on a bain marie to make it runnier, but be careful not to overheat and burn it!

      Place the second sponge on top.

      Using a palette knife, cover the side of the entire cake with ganache, smoothing it evenly as you go, then do the same with the top of the cake. There should be plenty of ganache, so be generous when coating the cake with it.

      Next, dot teaspoons of caramel randomly over the ganache. Again with your palette knife, gently swirl and spread the blobs of caramel over and slightly into the ganache to get a sort of two-tone ganache-caramel effect.

      Scatter the chopped Snickers Bars and hazelnuts on top and place some of the nuts around the side if desired/spare.

      Friday 8 July 2016

      Lemon and Pistachio Love Cake (gluten free)

      Lemon and pistachio Love Cake (gluten free)

      June was a difficult month. Aside from fasting 30 days’ straight for 18-odd hours a day and studying for and sitting an exam whilst fasting, there was that referendum result. A result which left me glumly moping around the house for days and from which I am still smarting.

      Lemon and pistachio Love Cake (gluten free)

      Part of the reason I absolutely love living in London is because of how multicultural and cosmopolitan it is; how accepting it is of everyone and anyone, regardless of which walk of life they’re from; how I don’t have to go as far as Spain to practice my Spanish because there are so many lovely Spaniards here, willing to give me the chance to speak it with them; how I am accepted, regardless of my skin colour, my faith or my mother tongue.


      Lemon and pistachio Love Cake (gluten free)

      It saddens me to the core to realise that many people in the country I call home don’t share this culture of acceptance and openness; that given the choice, they would ‘send everyone back to where they came from’, apart from, of course, their ‘own people’, even if their own people were once foreigners here too…


      Lemon and pistachio Love Cake (gluten free)

      And so, because of spending most of June morose, I’m afraid I didn’t have the slightest inclination to bake or publish a new baking post. For me, baking is a happy activity, to be engaged in when I myself am happy: June did not find me thus.


      Lemon and pistachio Love Cake (gluten free)

      However, we’ve made it through to July: fasting is done for another year (well, minus 11 days); my exam is over; Dr D and I have holibobs coming up; and, whilst it seems that what’s done is done and cannot be undone when it comes to Brexit, perhaps I can use this post to apologise to the rest of the world for the "not in my backyard" mentality and appalling decision-making skills of some of my fellow Brits. Truly, from the bottom of my heart, I am sorry. There, I feel better now!

      Lemon and pistachio Love Cake (gluten free)

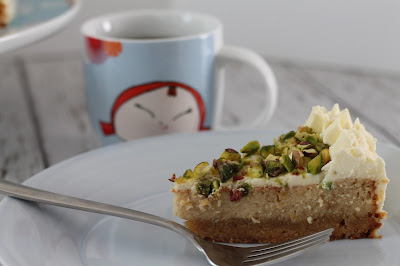
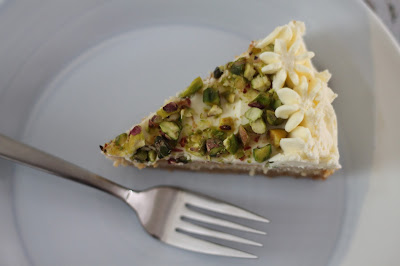
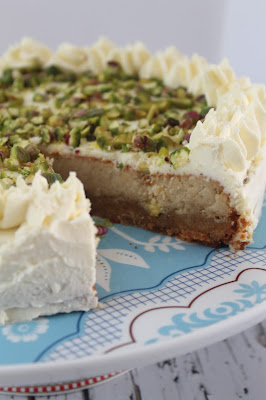
      And so on to cake. This is another naturally gluten free recipe, adapted from what’s known as Persian Love Cake. I don’t know where the Love bit comes from (but I like it!), but the Persian reference, I assume, is due to the fact the original versions have Persian influences such as rosewater in them. Since I changed it around quite a bit, I felt I couldn’t still justify the Persian reference, but I’m sticking with the Love Cake, because, well yes, I did love it and we need some more love in the world, clearly. The crunchy biscuit-like base layer is topped by a lighter layer, reminiscent of baked cheesecake, only far lighter. I then added a zingy mascarpone frosting to contrast the sweetness of the cake, but you could omit this if you prefer.


      Lemon and pistachio Love Cake (gluten free)

      (P.S. Behold my favourite mug! Isn't it magical?!)

      Adapted from Gourmet Traveller's Persian Love Cake; frosting adapted  from Butter Baking
      Yields 10-12 slices

      For the cake:
      • 360g ground almonds
      • 150g Demerara sugar
      • 200g soft light brown sugar
      • 120g unsalted butter, softened
      • Zest of 2 lemons
      • 250g Greek-style yogurt
      • 2 large eggs

      For the frosting:
      • 250g mascarpone
      • 300ml double cream
      • 4 tbsp/60g caster sugar
      • Juice of 1 lemon
      • Plus
      • 50g roughly chopped pistachios

      Preheat the oven to 180C (160c for a fan oven) and grease and line the sides and base of a 9”, round springform cake tin.

      Tip the ground almonds, sugars and butter into a large bowl and gently rub together with your fingertips until it’s all well combined and you have coarse crumbs the consistency of wet sand.

      Add the lemon zest and stir through the mixture, then spoon half of the almond mix into your prepared cake tin and press it down evenly with your fingers to cover the whole base.

      Add the yogurt and eggs to the remaining almond mix and beat with a spatula or wooden spoon until you have a smooth, mousse-like mixture. Pour this evenly over the base and bake for 45-50 minutes.

      Allow the cake to cool completely in its tin before removing.

      To make the frosting, place the mascarpone, cream and sugar in a large bowl and whisk with a handheld electric whisk until smooth (you’re looking for medium peaks). Add the lemon juice and lightly whisk again, just enough for the juice to be combined into the frosting.

      Place the cake on your serving plate and using an offset spatula, frost the sides and then the top of the cake.*

      Scatter over the chopped pistachios.

      *If you like, reserve some of the frosting and once you’ve smoothed some of it on the side and top of the cake and scattered over the pistachios, place what’s left in a piping bag and pipe swirls around the edge.

      Friday 20 May 2016

      Orange, almond and mascarpone layer cake (gluten free)

      Orange, almond and mascarpone layer cake (gluten free)

      The other day I was chatting to someone who was complaining to me about how, no matter how much they eat, they cannot gain any weight. “I’ve always weighed three pounds," they bemoaned, "and I just don’t seem to be able to put on more than that, even though I eat 12 billion gazillion calories a day.”

      It was difficult for me to know what to say at this point: “Oh yeah, I know what you mean, I have the same problem”? Hmm… no. “Oh, you poor thing, that must be really terrible for you”? Nope. “Yeah, I’ve always been a size -2 as well; don’t it just suck!”? Oh look, it’s a no again! All I could do was nod in a feeble attempt at sympathy whilst secretly wondering how it might feel to practice some of my boxing training moves on said person…

      Orange, almond and mascarpone layer cake (gluten free)

      Okay, so I know we all come in different shapes and sizes, with different metabolisms blah, blah, blah, and I’m sure that the plight of aforementioned poor skinny person must be somewhat frustrating for them, but really, I’m not sure I’m the right person to turn to for either empathy or sympathy on the matter. The last time I was called skinny was… no wait, never.

      I suppose such is the way of the world: we seem to spend all our time wishing we were a little bit thinner, a little bigger, a little shorter or a little taller, when really we – or perhaps more specifically in this instance I – should focus on what we do have rather than what we don’t have. Dr D frequently tells me I should be thankful for who I am.

      Orange, almond and mascarpone layer cake (gluten free)

      So my new motto is to be grateful! And amongst things I possess for which I am grateful: this cake recipe!

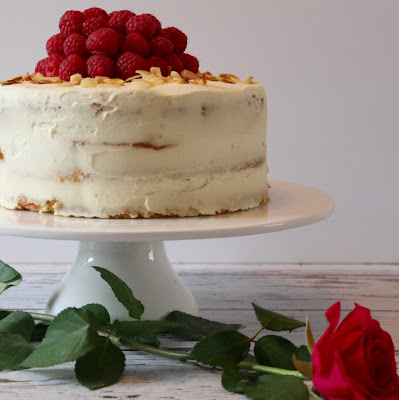
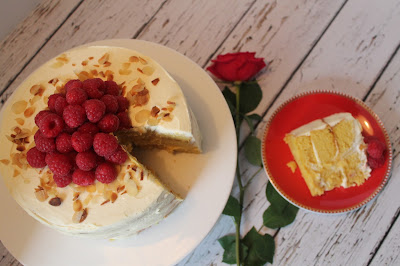
      This is a good cake. Wait, it’s a very good cake, and it’s perfect for summer, oh and it looks sooooo pretty! The fact it requires two oranges to be boiled for a couple of hours before it can be made is by the by, because it’s so worth it. Besides, you don’t have to stand over the oranges, just stick them in a pan of hot water and let them bob away happily until they’re done. The strange thing is, you can’t actually taste orange in the cake, but the fruit makes the sponge deliciously sweet and moist.

      Orange, almond and mascarpone layer cake (gluten free)

      I made this cake because I was asked to bake something gluten free for a party but those who could eat gluten pounced on it as eagerly as the gluten-free consumers - always the sign of a surefire winner. Suffice to say, I’ll be making it again.

      Orange, almond and mascarpone layer cake (gluten free)

      Yields about 12 slices

      For the cake:
      • 300g oranges to make 300g puree (this is roughly two whole oranges)
      • 9 large eggs
      • 375g caster sugar
      • 2 tsp baking powder
      • 375g ground almonds
      • 50g flaked almonds
      For the frosting:
      • 250g mascarpone
      • 250g double cream
      • 50g caster sugar
      • 1 tsp vanilla extract
      • 50g flaked almonds, toasted (I stuck mine in a nonstick frying pan and toasted them on a medium heat until they turned golden, stirring once in a while)
      • 1 punnet raspberries

      Place the oranges, whole with skin on, in a medium saucepan filled with water. Place the lid on the saucepan and place over a high heat.

      Boil the oranges until they are completely soft, which will take 1 - 2 hours.

      Once they’re soft, lift the oranges out of the water with a slotted spoon and transfer them to a food processor with about 3 tablespoons of the water they were boiled in. Blitz until you have a smooth puree, then allow to cool completely. If preparing the oranges a day or two in advance, store the puree in an airtight container in the fridge, or freeze until needed.

      When you’re ready to make the cake, preheat the oven to 150C (fan) and line the base of three 8” spring form tins with baking paper.

      In a large bowl, using a handheld electric whisk (or a manual if you want the workout), whisk together the eggs and sugar until they are light and airy (this usually takes about three or four minutes of constant whisking).

      Next, add in the cooled orange puree and whisk again to combine, before folding in the baking powder and ground almonds until they are thoroughly combined in the mixture.

      Split the batter equally between the tins, then sprinkle the 50g of almond flakes equally over the top of the three unbaked cakes.

      Place the tins on the middle shelf of the oven and bake for about 30 minutes, until the layers are lightly golden and spring back when touched in the middle.

      Remove from the oven and allow the cakes to cool completely in the tins before removing them. Do not try to remove them from the tins before they’ve totally cooled as they are very soft and so will fall apart!

      To make the frosting, using a stand mixer fitted with whisk attachment or a handheld electric whisk, whip together the mascarpone, cream, sugar and vanilla until smooth.

      To assemble the cake, place one of the cake layers on the plate you will be serving the cake on.

      Using a palette knife or an offset spatula, spread about a quarter of the frosting evenly over the top of the cake layer.

      Place the second layer on top of the first and again cover the top of it evenly with another quarter of the frosting.

      Place the final cake layer on top.

      With your knife or offset spatula, spread frosting thinly all around the side of the cake (you want some of the sponge to still be peeking through the frosting), until all of the side of the cake is covered in a thin but smooth layer of frosting.

      Use the remaining frosting to evenly cover the top layer of the cake.

      Scatter the toasted flaked almonds over the top of the cake, before finally placing the raspberries in a nice mountain on top of the centre of the cake.

      Thursday 10 March 2016

      Easter chocolate 'scotch eggs'


      Twinny loves her Cadbury’s Creme Eggs. Boy, does she love them. Even after all the recent hoo-ha about the recipe being altered, the shell no longer being made of Dairy Milk (sacrilege), and consumers getting fewer eggs for their money, twinny remains steadfast in her adoration of the eggy wonder.


      Let me give you an example. A couple of months back, I discovered that there was to be a temporary Cadbury’s Creme Egg pop-up café in London. Naturally, as a dutiful and caring sister, I promptly emailed the details to twinutha. Alas, due to prior engagements - for the most part, her day job cutting people open in order to save their lives - she was unable to make it to the eggstravaganza. Darn being a surgeon and it getting in the way of a good creme egg! And yet, never one to be deterred, she figured that if she was unable to get to the café, the café (or at least part of its menu) would come to her.


      Having seen that the pop-up would be serving creme egg toasties (yes, you read that right), she promptly went out, bought a bag of the eggs in their diminutive incarnation, popped umpteen of them between two doorstep-thick, heavily-buttered slices of bread and made her own version of the toastie. So proud was she of her resourceful and her homemade creation, she even posted photos on Facebook, and twinny is rarely ever to be seen on the book of Face.


      Needless to say, when I caught a glimpse somewhere on social media of the chocolate ‘Scotch eggs’ I’ve made for this post, with a mini creme egg at their core, the decree to make them was immediately mandated by my younger-by-one-minute sister. “No problem” I breezily replied, despite the fact that not only was there no recipe for the cakes, there wasn’t even any indication as to what their constituent parts were!


      So I did a little bit of thinking (not too much mind; my brain doesn’t like it), and am pleased to say, reverse engineered my own version of chocolate scotch eggs: a chocolate sponge, broken down into crumbs after baking and combined with a chocolate cream cheese frosting (preferable to buttercream in this instance as it’s far less sweet, thereby serving as a better counter to the cloying clagginess of the creme eggs). The cake and frosting combination is subsequently moulded around a creme egg into a ball, chilled for a while, and then dunked into a glossy chocolate ganache before being ‘breadcrumbed’ with some crushed mini eggs.


      I have to say that I’m pretty pleased with myself for how well these turned out, given that I was more or less making them up as I went along. If you need any incentive at all to make them, may I add that the feedback I got from everyone who tried them was stupendous. They really were a hit, even with people like my brother, who doesn’t usually go for rich chocolate desserts and cakes; I think they’d be a great Easter present should you be so inclined. They were also a lot of fun and really quite easy to make. Most importantly, they got the twinny seal of approval. And if twinny is happy, I am happy!

      Makes about 17 chocolate 'scotch eggs' (about the size of standard muffins)

      For the chocolate sponge:
      • 170 grams unsalted butter
      • 25g (3 level tbsps) cocoa powder
      • 180ml freshly brewed strong coffee (I used a single espresso shot with 180ml water)
      • 200g plain flour
      • 200g soft dark brown sugar
      • 3/4 tsp baking soda
      • 1/2 tsp salt
      • 2 large eggs
      • 80 ml buttermilk
      • 3/4 tsp vanilla extract
      For the chocolate cream cheese frosting:
      • 225g cream cheese, room temperature
      • 115g unsalted butter, softened to room temperature
      • 215g icing sugar, sifted
      • 50g cocoa powder, sifted
      • 1 tsp vanilla
      For the ganache:
      • 330ml double cream
      • 330g plain chocolate (40-50% cocoa), broken into chunks
      • 30g unsalted butter
      You will also need:
      • 2-3 bags of Cadburys mini creme eggs
      • About 2 bags of Cadburys mini eggs, crushed into small pieces
      To make the cake:
      Preheat the oven to 190C (170C fan) and grease the base and sides of a 9" square cake tin before also lining the base with greaseproof paper.

      In a large saucepan, heat the butter on a medium to high heat until it has all melted and is starting to foam and bubble a little. At this point, take it off the heat, add in the cocoa powder and whisk well to combine.

      Return the saucepan to the heat and add the coffee, giving it all a quick whisk to combine. Bring the mixture to a boil, then remove from the heat.

      Now add the flour, sugar, baking soda and salt and whisk together until you have a smooth, thick batter.

      Leave to cool for about five minutes.

      Once cooled, add the eggs, buttermilk and vanilla extract into the saucepan and give it all one more vigorous whisk to combine.

      Pour the batter into your cake tin and bake for 23-25 minutes, or until a knife/skewer inserted into the middle comes out clean. Remove from the oven and leave to cool completely.

      To make the frosting:
      Beat the cream cheese and the butter together, either in a stand mixer using the k-beater, or with a handheld whisk, on a medium to high speed. Beat for a good 3-5 minutes until you have a light and creamy consistency.

      Add in the sifted icing sugar and cocoa powder and beat again (start on a low speed to avoid getting icing sugar and cocoa powder all over you and your kitchen), before adding the vanilla extract and giving one final mix to combine. The end frosting should be nice and light in texture.

      To make the ganache:
      Note that I would suggest you do this when you are ready to coat the eggs, not before as you will need the ganache to be runny so that you can dunk the eggs in it. The longer it has to sit, the thicker it will become, making it un-dunkable (though it can be heated gently to melt it again).

      Heat the cream in a saucepan on a medium heat, bringing it just to the boil.

      Whilst the cream is heating, place the chocolate chunks and slab of butter into a large bowl.

      As soon as the cream comes to the boil, remove it from the heat and pour it over the chocolate and butter. Allow to sit for one minute.

      With a spatula, whisk or wooden spoon, stir the cream, chocolate and butter together, until to you have a beautifully glossy, silky ganache.

      To assemble the 'eggs':
      Remove the cake from it's tin and break it into four or so large pieces in a large bowl. Use a palette knife or your fingers to then crumble the cake up completely.

      Once you have a large bowlful of cake crumbs, tip in the cream cheese frosting and stir it into the crumbs with a large metal spoon, or again use your hands to mix, until the frosting and crumbs are well combined.

      Place a baking sheet next to you, along with the mini creme eggs.

      Now take a large handful of the cake mix (about two tablespoons' worth). Place a mini creme egg on top and then use your hands to mould the cake mix around the egg. Squeeze it fairly firmly between your two palms to get a compact, round egg shape. Place on the baking sheet.

      Continue to make the eggs until you have run out of the cake mix, then place the baking sheet in the fridge, allowing the eggs to chill for at least an hour.

      Once the eggs have chilled for a sufficient time, one by one, dunk them in the bowl of ganache, turning them with a large spoon if necessary to coat all over. Use two large spoons to pull the coated egg out of the bowl and place it back on the baking sheet.

      Sprinkle with some of the crushed mini eggs.

      Repeat with each of the scotch eggs until they're all coated and 'crumbed'. If the ganache starts to become too thick for dunking during the process, stick it in the microwave for just a few seconds to warm it up and get it runny again.

      Once all of the eggs are complete, place in the fridge for four to five hours (or overnight) to set.

      Remove from the fridge about an hour before serving ideally, although they can also be eaten fridge-cold.

      PS If transporting them, you could do what I did and place each egg in a muffin case to avoid them getting bashed about.