Showing posts with label blondies. Show all posts

Saturday, 25 February 2017

Salted Rolo blondies

Salted Rolo blondies

Whoa Nelly, am I relieved that January is over! It felt like a tortuously long 31 days of everyone around me wanting to ram their New Year’s resolution successes down my throat. I mean, good for them, but they didn't seem to believe me when I protested that I didn’t need a daily report on their seven-hour bodypump sessions in the gym, or that I couldn't see the point in celebrating the fact that they'd survived on celery sticks and cucumber seeds alone since the start of the month, (unless we were going to be celebrating with cake of course).

Salted Rolo blondies

Perhaps this makes me sound like a grumpy moo-face, and if I’m honest, part of the reason everyone’s goal-smashing exuberance bothers me is probably only because it makes me feel guilty about my own extra layer of chub acquired over Crimbo, (which is now keeping me nice and warm thank you very much!) But really, the main reason I don’t get it all is that I just don’t understand why we seek to make ourselves miserable with self-flagellating, unsustainable New Year’s resolutions.

Salted Rolo blondies

My impatience with it all hit its peak a couple of weeks back when I unwittingly found other people’s resolutions being thrust upon me. First there was the raisin incident...

Salted Rolo blondies

Whilst quietly snacking on some raisins at my desk, minding my own business, I was informed by a colleague that her personal trainer advises that one should eat raisins in a very specific way: always one at a time (let’s not be greedy now); pick up you raisin and take time to look at it and appreciate it (for what? Its wrinkliness?!); smell it (I kid you not); then when you feel you are ready to eat it, ensure you chew on it at least 50 times. I tested Mr Personal Trainer's advice and after two raisins, caved, shoving about 15 in my mouth in one go and downing them in as many seconds.

Salted Rolo blondies

The true New Year’s resolution infraction, however, was when an email from on high pingetty-ponged its way into my inbox, suggesting that cakes and treats should no longer be allowed in the office. Nothing to do with the sender of the email embarking upon a New Year’s diet at all, and everything to do with a sudden new-found concern for the health of employees’ teeth. You might imagine that I wasn't best pleased by this suggested sanction, so I went rogue, sneaking in these bonkersly addictive Salted Rolo blondies when the person banning happiness cakes wasn't looking. Funnily enough, nobody else seemed to be complaining that I did so.

Salted Rolo blondies

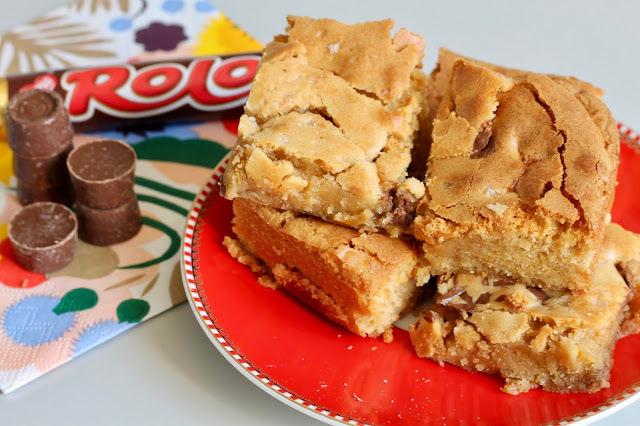
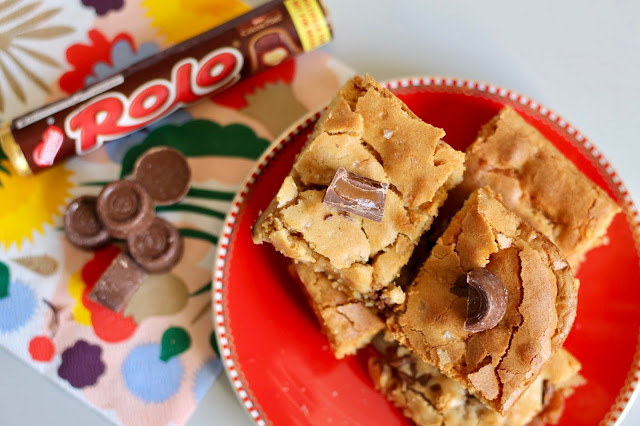
I can't say enough how much I love these blondies. So much that after the first batch was demolished, I straight away made a second. According to Dr D, they're one of the best things I've baked. I'm not gonna lie: he might well be right. They're like a cross between a soft, doughy cookie and a dense, moist brownie. The Rolos melt and set at the bottom, giving a half-crunchy, half-chewy caramel base that is complemented so well by the salt (as you might imagine). The second time around, I added chocolate chunks for added texture and bite, but shockingly, I am wondering if I actually preferred the chunk-less batch. I've included them in the recipe as optional, so will leave it to you to decided if you include them or not. Either way, they're extremely quick to whip up and I'm pretty sure you'll love them as much as Lord and Lady Darbyshire did.

Yields 16 large blondies
  • 200g unsalted butter
  • 150g white chocolate, broken up into small squares
  • 150g light muscovado sugar
  • 50g demerara sugar
  • 3 large eggs
  • 1 tsp vanilla extract
  • 200g plain flour (no need to sift)
  • 150-200g Rolos, fridge cold (leave in the fridge until ready to add to the blondie batter)
  • 75-100g milk or plain chocolate, chopped into small chunks (optional)
  • Maldon salt

Preheat your oven to 160C (fan).

Grease and line a 9”/23cm square baking tin. If using a silicone tin like I did, you don’t need to line with greaseproof paper but you may still want to lightly grease the base of the tin, as the Rolos make these blondies uber-sticky little blighters!

Start by melting and browning the butter in a heavy-based, light-coloured saucepan over a gentle heat (you want the pan to be light in colour so that you can keep an eye on the butter as it changes colour).

Once the butter has melted, keep it over the heat in order to turn it into browned butter: It will soon start to foam and bubble gently and you will notice that it will change colour from pale yellow to a deep, golden brown. At this stage, you need to keep a close eye on it as it can burn very quickly. When it starts to smell nutty and toasted and is really golden in colour, immediately remove from the heat.

Allow the butter to cool for about one minute, then tip the broken squares of white chocolate into the pan and let them just sit in the heat of the butter.

Meanwhile, place the sugars and eggs in a large bowl and beat together using a handheld electric whisk. Beat for 2-3 minutes on a high speed until the mixture is thick and pale. Add the vanilla and beat again briefly.

Returning to your melted butter and white chocolate, take a spatula and gently stir to fully combine. Pour the melted goop into your bowl of whisked ingredients, then tip in the flour as well. Fold with either a large metal spool or a spatula. Be patient here – don’t beat the ingredients or you’ll lose the air from the whisking process. Just keep folding gently and persistently until there are no visible clumps of flour or pools of melted butter in the batter.

Pour the blondie batter into the cake tin and set aside whilst you turn your attention to the key ingredients!

Remove the Rolos from the fridge and chop them all in half (you’ll find setting them in the fridge makes chopping them much easier). Scatter the Rolos evenly over the batter, then take a good pinch of Maldon salt and do the same.

Bake the blondie batter for 25 minutes (if adding chocolate chunks, open the oven door after 15 minutes and sprinkle the chunks over the batter, pushing them in ever so slightly if you find that the top of the blondie has started to set. Then bake for the remaining 10 minutes). RESIST any urge to bake for longer than 25 minutes in total – you want the blondies to be soft, fudgy and gooey, not dried-out, rock-hard clumps that stick in the throat!

When the blondies are in the last minute or two of their baking time, fill your sink with ice-cold water to a height that is about half that of your baking tin. Once the blondies have baked, remove the tin from the oven and gently place it in the sink of cold water, (making sure the water doesn’t get into the tin!!!) Placing the blondies in cold water will stop them cooking further, again helping them to stay gooey and soft. Allow them to cool in the water for about half an hour, then place them in the fridge to set completely. This will take at least 4-5 hours, but really I would recommend leaving them to set overnight (Dr D and I found they tasted better after the first day anyway).

After the blondies have set fully, cut into 16 squares. You may find they need to be prised gently out of the tin with a palette knife, as the melted caramel from the Rolos may have gotten them stuck to the base of the tin a little. If this doesn’t work, I recommend eating the whole lot with a spoon straight of the tin!
Sunday, 21 April 2013

Browned butter and caramelised white chocolate blondies

Browned butter and caramelised white chocolate blondies

There are few foods in this world that I don't like.  In fact, upon racking my brains to think of what they were, the only two I could come up with were papaya and butternut squash.  If I’ve offended any papaya or butternut squash lovers out there, I can only apologise, I’m a disappointment, I know.

Anyhoo, whilst there aren't many foods in the world that I actively dislike, there are a number that I am, well let's say, indifferent to.  I don't hate them; I wouldn't turn my nose up in displeasure if you put them before me, but at the same time the prospect of eating them doesn't excite me, so more than likely, I'd pass up the opportunity.

White chocolate falls squarely into this category.  My thoughts on it are simply: if I'm going become a heffalump, I'd rather do so by stuffing my already chubby face with milk or dark chocolate, thanks all the same.

Browned butter and caramelised white chocolate blondies

Now, let's park my ramblings about white chocolate for just one second.  We'll come back it in a tickety-boo.  In the meantime, I'd like to tell you about a place in London that I absolutely adore.  It's a coffee shop/bakery called Bea's of Bloomsbury.  If I ever owned a cafĂ©, Bea's is more or less everything I'd want it to be: warm, inviting, cosy and with some of the best red velvet cupcakes around.  Bea's is also where I first tried blondies.

For the uninitiated, blondies are basically brownies, but they don't contain cocoa, instead using brown sugar to give them an almost butterscotch taste.  I hear ya’ - a brownie without the cocoa, what's the point?!  And yet, when I bit into this blondie, O. M. Gosh!!!  It was most delicious - moist, dense, fudgy and yummy in my tummy!  This was something I was going to have to try making myself.

Browned butter and caramelised white chocolate blondies

Enter white chocolate, stage right.

You see, despite my nonchalant feelings towards white chocolate in its most natural form, I'm pretty darned sure that Bea puts white chocolate in her blondies.  So I set about trying to recreate the little beauties.  The problem is, whilst my intention was to get something as close to Bea's blondies as possible, I got led astray…

A while ago, one of my favourite food bloggers, Emma at Poires au Chocolat, introduced me via her blog to caramelised white chocolate.  Emma, like me, is indifferent towards white chocolate in its normal state, but she argues that if you caramelise it (roast in the oven at a low temperature for about 45-50 minutes), it transforms into a delicious golden goo that could easily be eaten by the spoonful.  I tried it.  She's right.  It's like liquid toffee.  This stuff was going into my blondies!

Caramelised white chocolate

Needless to say, I got carried away, decided to throw some browned butter into the mix, just to add to the deep, unctuous flavour already created by the caramelised white chocolate and ended up with some blondies that were nothing like Bea's.  It didn't matter.  These are good.  Seriously good.  They're like a chewy, fudgy, sticky, toffeeish non-brownie blondie.

As for replicating Bea's blondies, well perhaps I'll try again sometime, but until then, I guess I'll just have to go back to one of her coffee shops next time I need a fix of one of her blondies.  It's a hardship but I reckon I'll manage.

Browned butter and caramelised white chocolate blondies

Adapted from Smitten Kitchen
Makes approximately 40 blondies

Ingredients:

  • 300g good quality white chocolate (I used Lindt Lindor)
  • Pinch of ground sea salt (I used Maldon salt)
  • 225g unsalted butter
  • 400g brown sugar (I used dark, but light or dark is fine)
  • 2 large eggs
  • 2 tsps vanilla extract
  • 250g plain flour
  • 250g dark chocolate (40% cocoa), chopped into chunks - optional, for extra chocolatyness (if you prefer, you can use 125g and stir it into only half the batter so that you have one set of blondies with chocolate chunks and one without.  I did this but personally I much preferred the blondies with chocolate chunks)
To caramelise the white chocolate
This is a very easy process but it takes about 50 minutes so make sure you allow yourself the time.  If you don't have the time, you can simply melt the chocolate in the microwave or over a bain marie, but it won't turn golden and turn into that caramelised liquid toffee I told you about.

Preheat your oven to 120C.

Break the chocolate into pieces and place into an oven-proof dish.  Put the dish into the oven, stirring the chocolate with a spatula every five to 10 minutes, until it becomes a lovely golden colour.  This should take roughly 50 minutes.  Once your chocolate is done, remove from the oven and stir in the pinch of sea salt.

Note that my chocolate didn't start to change colour until about 30-45 minutes into the process, so I let it carry on for about 55 or 60 minutes in total.  Don't worry if the chocolate looks lumpy or as though it's seizing at first, it should eventually become smooth, glossy and lump-free.

To brown the butter
Browning butter can be a daunting process if you've never done it before.  The very first time I did it, I burnt my butter and had to start all over again!  If you're nervous about it, there's a great picture how-to guide over on Ambitious Kitchen.  As with the caramelised white chocolate, you could just melt the butter normally, but without roasting the chocolate and browning the butter, the blondies won't be as deeply toffeeish and caramelised as they should be.

To brown the butter, slice it into a few pieces, place the slices in a saucepan (it's easier if you have a light-coloured saucepan so that you can see the butter start to take on a golden colour as it browns) and have a whisk at the ready.  You should also have a cold bowl ready (either chill it in the fridge or place it over some ice.

Place the saucepan over a medium heat and begin melting the butter.  Small bubbles will soon start to appear all over the surface of the butter.  As soon as this happens, start to whisk it consistently.

Next, the butter will start to crackle and foam, with larger bubbles all over the surface.  Continue to whisk.

Finally, the crackling will stop and the bubbles will reduce in size again.  The surface of the butter will remain foamy.  You should still be whisking!

After a couple of minutes, the butter will begin to brown on the bottom of the saucepan and the foam will reduce a little.  Remove from heat as soon as the butter begins to turn a golden brown and give off a nutty aroma.  Immediately transfer the butter to the cold bowl to prevent burning. Set aside to cool.

To make the blondies
Preheat oven to 180C (160C fan) and grease and line two deep baking trays that are roughly 8 x 8 inches each.

With a wooden spoon or a handheld electric whisk, beat the browned butter and sugar together in a bowl until smooth.

Add the eggs and vanilla to the butter-sugar mix and beat again.

Next pour in the caramelised white chocolate, mixing vigorously to incorporate it into the mix.

Sift the flour over the mixture and then beat it in.

Finally, if using chocolate chunks, stir these into your batter (if only using 125g chocolate, first spoon half of the plain batter into one of your tins, then add the chocolate to the remaining batter in the bowl).

Spoon the batter into the baking trays and bake for around 25 minutes.  At this stage they should still be gooey inside but they will set as they cool.  Don't over-bake them as you want them to be moist and chewy.

Remove from oven and leave to cool before cutting into small squares.